Category: Technology

  • How Do I Set Up a New PlayStation Network Account?

    How Do I Set Up a New PlayStation Network Account?

    If you’re stepping into the world of PlayStation gaming, setting up a PlayStation Network (PSN) account is one of the first steps you need to take. This account is your gateway to the PlayStation ecosystem, allowing you to play online, purchase games, and access exclusive content. But if you’re wondering, How do I set up a new PlayStation Network account?, this comprehensive guide will walk you through the entire process, making it easy and hassle-free.


    Why Do You Need a PlayStation Network Account?

    Before diving into the setup process, let’s explore why having a PSN account is crucial. A PlayStation Network account unlocks several key features:

    1. Access to Online Multiplayer: If you enjoy playing with or against friends online, a PSN account is a must.
    2. PlayStation Store: Purchase games, add-ons, and more directly from your console or online.
    3. Free Monthly Games: With a PlayStation Plus subscription, you get free games every month.
    4. Cloud Storage: Save your game progress and settings securely in the cloud.
    5. Trophies and Social Features: Track your gaming achievements and connect with other players worldwide.

    If you’re ready to enjoy these benefits, let’s answer the burning question: How do I set up a new PlayStation Network account?


    Step-by-Step Guide: How Do I Set Up a New PlayStation Network Account?

    Step 1: Prepare the Essentials

    Before you begin, make sure you have:

    • A stable internet connection.
    • A valid email address.
    • A secure password (a mix of uppercase, lowercase, numbers, and special characters is recommended).
    • Optional: A payment method (credit/debit card or PayPal) if you plan to make purchases on the PlayStation Store.

    Step 2: Set Up Your Account on the Console

    The easiest way to set up a PSN account is directly from your PlayStation console. Here’s how:

    For PlayStation 5:

    1. Turn on your PlayStation 5 and connect it to the internet.
    2. On the home screen, navigate to Settings > Users and Accounts > Account > Sign In.
    3. Select Create an Account.
    4. Follow the on-screen prompts to enter your date of birth, email address, and password.
    5. Choose a unique online ID (your PSN username) and fill in your profile details.
    6. Confirm your account via the verification email sent to your email address.
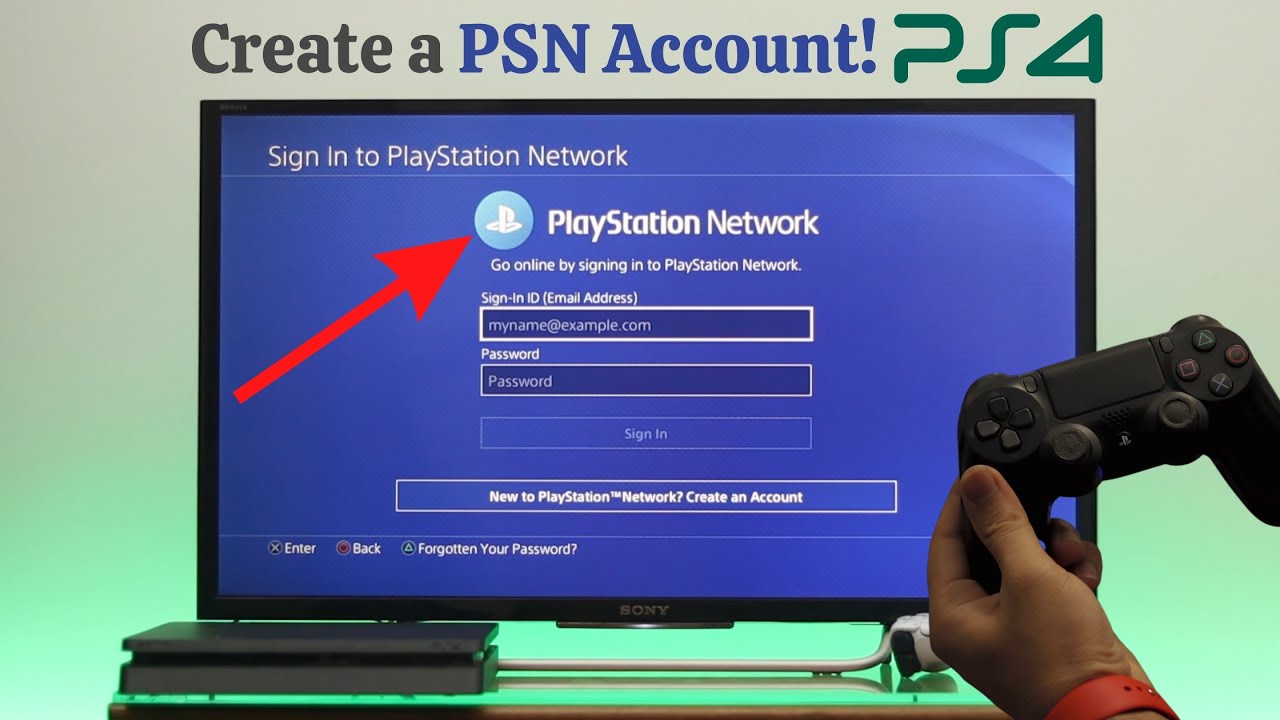
    For PlayStation 4:

    1. Turn on your PlayStation 4 and connect it to the internet.
    2. Go to New User on the login screen and select Create a User.
    3. Select Next, then choose New to PSN? Create an Account.
    4. Enter the required details, such as your date of birth, email address, and password.
    5. Choose your online ID and personalize your profile.
    6. Verify your account through the email confirmation link.

    Step 3: Set Up Your Account on a Web Browser

    If you don’t have immediate access to a console, you can also create a PSN account using a web browser. Follow these steps:

    1. Open a web browser on your computer or smartphone.
    2. Go to the official PlayStation Network website.
    3. Click on Sign In and then select Create New Account.
    4. Enter your details, including email address, password, date of birth, and location.
    5. Choose your online ID and complete your profile setup.
    6. Verify your account via the email sent to your inbox.

    Step 4: Customize Your Account

    Once your account is created, you can:

    • Add a profile picture.
    • Link social media accounts.
    • Set privacy settings to control who can see your profile, games, and activities.
    • Add friends and join parties for a more social gaming experience.

    Tips for Creating a Secure PSN Account

    1. Use a Strong Password: A robust password protects your account from unauthorized access.
    2. Enable Two-Step Verification: Add an extra layer of security by enabling two-step verification. This feature sends a verification code to your phone or email whenever you log in from a new device.
    3. Be Careful with Your Online ID: Your online ID is your gaming identity, so choose a name you’ll be happy with for a long time.
    4. Keep Your Email Secure: Ensure the email linked to your PSN account is secure and regularly monitored.

    Troubleshooting: Common Issues and Solutions

    Issue 1: Unable to Verify Email Address

    If you didn’t receive the verification email:

    • Check your spam or junk folder.
    • Ensure the email address you entered is correct.
    • Resend the verification email from the account creation page.

    Issue 2: Forgotten Password

    If you forget your password, reset it by:

    1. Going to the PSN login page.
    2. Selecting Forgot Your Password?.
    3. Following the instructions to reset your password.

    Issue 3: Account Locked

    If your account is locked due to too many failed login attempts:

    • Wait for the lockout period to expire.
    • Reset your password if necessary.

    Frequently Asked Questions

    Can I Change My Online ID Later?

    Yes, you can change your online ID, but it may affect game saves and progress for some titles. The first change is free, while subsequent changes may incur a fee.

    Do I Need a PlayStation Plus Subscription?

    A PlayStation Plus subscription is optional but necessary for online multiplayer in most games. It also offers free monthly games and exclusive discounts.

    Can I Use the Same PSN Account on Multiple Consoles?

    Yes, you can use your PSN account on multiple consoles, but only one can be set as your primary console at a time.


    Conclusion

    Setting up a PlayStation Network account is a straightforward process that opens up a world of gaming possibilities. Whether you’re on a PlayStation console or using a web browser, this guide answers the question, How do I set up a new PlayStation Network account?” and provides you with all the information needed to get started. Take the time to secure your account and customize it to enhance your gaming experience. Once you’re set up, you’re ready to dive into the incredible world of PlayStation gaming!

  • How to Start a Business

    How to Start a Business

    A Step-by-Step Guide for Aspiring Entrepreneurs

    Starting a business is an exciting and challenging endeavor. Whether you’re motivated by the desire for financial independence, the freedom to be your own boss, or a passion for a specific product or service, the journey to entrepreneurship is rewarding. But, how to start a business can be a daunting question if you don’t know where to begin. In this comprehensive guide, we’ll walk you through the key steps involved in setting up your own business from scratch.


    1. Identify Your Business Idea

    Before you dive into the logistics of how to start a business, it’s essential to come up with a solid business idea. This idea should not only resonate with your passion and skills but also address a market need or solve a problem. Start by conducting market research to understand the demand for your product or service and identify your target audience.

    Think about industries or niches where you see growth potential. Do you have a product or service in mind? Or maybe you’re looking to improve an existing product or create a new approach to solving an age-old problem. The key is to ensure that your business idea is viable, scalable, and has a potential customer base.

    2. Create a Business Plan

    Once you have a clear business idea, the next step is to create a business plan. A business plan is a roadmap for your business that outlines your goals, strategies, target market, competition, marketing plan, financial projections, and operational structure. Your business plan serves as the blueprint for your success and is essential for securing funding if you need it.

    Here’s what you should include in your business plan:

    • Executive Summary: A brief overview of your business, including the mission, vision, and what makes your business unique.
    • Company Description: Detailed information about your business, including its legal structure (e.g., sole proprietorship, partnership, LLC).
    • Market Research: A study of your target audience and competitors.
    • Marketing Strategy: Your plans for reaching and retaining customers.
    • Financial Plan: Projected income, expenses, and profits. Be sure to include how much money you need to get started.
    • Operational Plan: How your business will function day-to-day.

    3. Choose a Business Structure

    One of the most important steps when learning how to start a business is deciding on a legal structure for your company. This decision will affect your taxes, liability, and other important factors. The most common business structures are:

    • Sole Proprietorship: The simplest form of business ownership, where you alone are responsible for the business.
    • Partnership: A business owned by two or more people who share responsibilities and profits.
    • Limited Liability Company (LLC): Offers liability protection for personal assets, making it a popular choice for small businesses.
    • Corporation: A more complex business structure, usually chosen by larger companies, where the business is legally separate from its owners.

    Each structure has its advantages and drawbacks, so it’s important to consult a legal or business professional to choose the right one for your goals.

    4. Register Your Business

    Now that you’ve chosen a business structure, it’s time to register your business. This step involves choosing a unique name for your business and filing the necessary paperwork with the appropriate government agency. Depending on your location, you may need to register with local, state, or federal authorities.

    When registering, make sure your business name is unique and not already in use. You can check for name availability through your local business registry or online search tools. After that, you’ll need to apply for the necessary permits and licenses required in your industry.

    5. Secure Funding for Your Business

    Most new businesses require some form of capital to get started. Understanding how to start a business also means knowing how to fund it. If you don’t have the personal funds available, you’ll need to explore various funding options. Here are a few popular ones:

    • Personal Savings: Using your own savings to fund your business.
    • Loans: Small business loans from banks or financial institutions.
    • Investors: Angel investors or venture capitalists who can provide funds in exchange for equity.
    • Crowdfunding: Platforms like Kickstarter or Indiegogo allow you to raise funds from the public in exchange for rewards or equity.

    Consider the pros and cons of each funding source and make sure you have a solid financial plan to repay any loans or meet the expectations of your investors.

    6. Build Your Brand Identity

    Creating a strong brand is essential when learning how to start a business. Your brand identity is the way your customers perceive your business and it should reflect your values, mission, and unique selling proposition. Start by designing a logo and developing a visual identity that resonates with your target audience.

    Consider the following aspects:

    • Logo: Your logo should be professional, memorable, and visually appealing.
    • Brand Voice: Define the tone and language you’ll use to communicate with your customers.
    • Tagline: A catchy phrase that sums up your business and resonates with your audience.

    Also, create a website and establish an online presence on social media platforms like Facebook, Instagram, LinkedIn, or Twitter. A strong online presence will help you build brand awareness and attract customers.

    7. Market Your Business

    Once your business is set up and ready to launch, you need to develop a marketing plan to reach your customers. Marketing is crucial to drive sales and grow your brand. You can use both traditional and digital marketing strategies to promote your business.

    Some effective marketing techniques include:

    • Content Marketing: Create valuable content like blogs, videos, or podcasts that showcase your expertise.
    • Social Media Marketing: Promote your products and services through social media platforms.
    • Email Marketing: Build an email list and send newsletters or promotional offers to engage with customers.
    • Paid Advertising: Consider using paid ads on platforms like Google Ads or Facebook to increase visibility.

    Your marketing strategy should align with your target audience and budget. Make sure to track your results and adjust your strategies accordingly.

    8. Launch Your Business

    After months of preparation, it’s finally time to launch your business. Whether it’s through a grand opening event, an online launch, or a marketing campaign, make sure you generate excitement and draw attention to your business.

    Reach out to your network, influencers in your industry, or media outlets to spread the word. You can also offer discounts or special promotions to encourage early sales and build a customer base.

    9. Monitor Your Business Performance

    The work doesn’t stop once your business is launched. One of the key components of successfully knowing how to start a business is continuously monitoring your performance. This involves tracking sales, customer satisfaction, expenses, and other key metrics.

    Use accounting software or hire an accountant to manage your finances and ensure that your business remains profitable. Regularly assess your marketing efforts to see if they are yielding the expected results. If something isn’t working, don’t be afraid to pivot and adjust your approach.

    Conclusion

    Starting a business is a complex process that requires careful planning, determination, and resilience. By following these steps and understanding how to start a business, you’ll be well on your way to creating a successful enterprise. Remember that challenges are inevitable, but perseverance and a clear vision will help you overcome them. Stay focused, continue learning, and adapt as needed, and your business will have the chance to thrive in today’s competitive marketplace.

    In summary, starting a business involves identifying a business idea, creating a plan, choosing a structure, registering your business, securing funding, building your brand, marketing your product or service, launching your business, and monitoring its performance. The journey may be tough, but it’s also one of the most rewarding experiences you can have. Best of luck on your entrepreneurial journey.

  • How to Set Up Windows on Mac: A Comprehensive Guide

    How to Set Up Windows on Mac: A Comprehensive Guide

    How to Seamlessly Set Up Windows on Your Mac: A Step-by-Step Guide

    The Mac ecosystem is known for its sleek design, robust performance, and user-friendly interface. However, there are times when you may need to use Windows-specific applications or software not available on macOS. Fortunately, setting up Windows on a Mac is a straightforward process, thanks to Apple’s Boot Camp and other virtualization tools. In this guide, we’ll explore how to set up Windows on Mac, covering various methods to help you get started seamlessly.


    Why Install Windows on a Mac?

    There are several reasons you might want to set up Windows on your Mac:

    • Compatibility: Some software and games are designed exclusively for Windows and aren’t natively supported on macOS.
    • Development and Testing: Developers often need to test applications in a Windows environment.
    • Dual Operating Systems: Access the best of both macOS and Windows on a single device.

    Prerequisites for Setting Up Windows on Mac

    Before diving into the setup process, make sure you have the following:

    1. A Compatible Mac: Most modern Macs (MacBook Pro, MacBook Air, iMac, and Mac Mini) support Windows installation through Boot Camp.
    2. Windows Installation File (ISO): Download a genuine copy of the Windows ISO file from Microsoft’s official website.
    3. Sufficient Storage Space: Ensure your Mac has at least 64GB of free space, though 128GB or more is recommended for optimal performance.
    4. A USB Drive (Optional): For older Macs, you may need a USB drive with at least 16GB of storage to create a bootable installer.
    5. Backup Your Data: Always back up your important files using Time Machine or an external storage device before proceeding.

    Method 1: Setting Up Windows on Mac Using Boot Camp

    Apple’s Boot Camp Assistant is the most popular method to set up Windows on a Mac. Here’s a step-by-step guide:

    Step 1: Open Boot Camp Assistant

    1. Open the Applications folder and navigate to Utilities.
    2. Launch Boot Camp Assistant.
    3. Follow the on-screen instructions to partition your hard drive and allocate space for Windows.

    Step 2: Download Windows Support Software

    Boot Camp Assistant will automatically download the necessary Windows support software (drivers) to ensure your Mac’s hardware, such as the trackpad, keyboard, and camera, works seamlessly on Windows.

    Step 3: Create a Windows Partition

    1. Use the slider to allocate storage for Windows. For general use, allocate at least 64GB, but for gaming or intensive applications, consider 100GB or more.
    2. Click Install to partition the drive and restart your Mac.

    Step 4: Install Windows

    1. After the restart, your Mac will boot into the Windows installer.
    2. Select the BOOTCAMP partition and click Format to prepare it for installation.
    3. Follow the on-screen instructions to complete the installation.

    Step 5: Install Windows Drivers

    Once Windows is installed, Boot Camp will prompt you to install the support software. This step ensures that your Mac’s hardware functions properly in the Windows environment.


    Method 2: Setting Up Windows on Mac Using Virtualization Software

    If you prefer to run Windows alongside macOS without restarting your computer, virtualization software like Parallels Desktop, VMware Fusion, or VirtualBox is an excellent alternative.

    Step 1: Choose Virtualization Software

    • Parallels Desktop: User-friendly and optimized for macOS.
    • VMware Fusion: Powerful and feature-rich.
    • VirtualBox: Free and open-source.

    Step 2: Install the Virtualization Software

    1. Download and install your chosen software.
    2. Launch the application and follow the setup wizard.

    Step 3: Import the Windows ISO File

    1. During the setup process, the software will prompt you to select the Windows ISO file.
    2. Allocate resources such as CPU cores, RAM, and storage space for the virtual machine.

    Step 4: Install Windows

    1. Follow the on-screen instructions to install Windows within the virtual machine.
    2. Once the installation is complete, install the guest tools or drivers provided by the virtualization software for optimal performance.

    Method 3: Using CrossOver or Wine

    For users who only need to run specific Windows applications, CrossOver and Wine are lightweight solutions that don’t require installing a full Windows operating system.

    Step 1: Install CrossOver or Wine

    1. Download and install CrossOver or Wine from their official websites.
    2. Launch the application.

    Step 2: Configure the Application

    1. Use the interface to locate and install the Windows application you need.
    2. Follow the prompts to configure the software for macOS.

    Step 3: Run Windows Applications

    Once configured, you can run your Windows applications directly from macOS without needing to switch operating systems.


    Tips for Managing Windows on a Mac

    1. Switch Between macOS and Windows: If you’ve used Boot Camp, restart your Mac and hold down the Option key during boot to select the operating system.
    2. Update Regularly: Keep both macOS and Windows updated for optimal performance and security.
    3. Optimize Storage: Use external drives or cloud storage to manage files across operating systems efficiently.
    4. Protect Your Mac: Install antivirus software on both macOS and Windows to safeguard your data.

    Conclusion

    Knowing how to set up Windows on Mac opens up a world of possibilities, allowing you to enjoy the versatility of two operating systems on one powerful device. Whether you choose Boot Camp for a dedicated Windows experience or virtualization software for seamless multitasking, the process is accessible and straightforward. By following this guide, you can effortlessly set up Windows on your Mac and unlock its full potential for both work and play.

  • How to Create a YouTube Channel

    How to Create a YouTube Channel

    YouTube is one of the most powerful platforms for sharing content, building a brand, and reaching a global audience. Whether you want to showcase your talents, teach others, or build a business, starting a YouTube channel is a fantastic way to achieve your goals. If you’re wondering how to create a YouTube channel, this guide will walk you through the entire process, from setup to optimization.

    Why Start a YouTube Channel?

    Before diving into the steps of creating a YouTube channel, it’s essential to understand why starting one is beneficial:

    1. Reach a Global Audience: With over 2 billion monthly active users, YouTube allows you to connect with people from all over the world.
    2. Build a Brand: Whether for personal branding or business purposes, a YouTube channel helps establish your presence in your niche.
    3. Monetization Opportunities: Through ads, sponsorships, and memberships, YouTube creators can generate significant income.
    4. Share Your Passion: It’s a platform to showcase your hobbies, skills, and knowledge to a wider audience.
    5. Educational Value: You can teach, inspire, and help others by sharing valuable content.

    Now, let’s dive into how to create a YouTube channel step by step.

    Step 1: Set Up a Google Account

    A Google account is required to create a YouTube channel. Here’s how to set one up:

    1. Visit Google Sign-Up and complete the registration form.
    2. Provide your name, email address (or create a new Gmail address), and password.
    3. Verify your account using the code sent to your email or phone.
    4. Once your Google account is set up, you can proceed to YouTube.

    If you already have a Google account, you can skip this step.

    Step 2: Create a YouTube Channel

    Here’s how to create a YouTube channel using your Google account:

    1. Go to YouTube and sign in with your Google account.
    2. Click on your profile picture in the top-right corner.
    3. Select Create a Channel from the dropdown menu.
    4. Choose whether you want a personal channel or a brand account.
      • Personal Channel: Tied to your name and Google account.
      • Brand Account: Offers more customization and allows multiple users to manage the channel.
    5. Enter your channel name and click Create.

    Congratulations! You’ve now created your YouTube channel.

    Step 3: Customize Your Channel

    Customization is key to making your channel stand out. Here’s how to personalize it:

    1. Add Channel Art and Profile Picture

    1. Go to your channel homepage.
    2. Click on Customize Channel > Branding.
    3. Upload a profile picture that represents you or your brand. Recommended size: 800 x 800 pixels.
    4. Add a banner image (channel art). Recommended size: 2560 x 1440 pixels.

    2. Write a Channel Description

    1. In the Basic Info section, add a description about your channel.
    2. Include keywords that describe your content and niche.
    3. Add links to your website and social media profiles.

    3. Set Up a Channel Trailer

    1. Create a short video introducing your channel.
    2. Highlight what viewers can expect and encourage them to subscribe.

    Step 4: Plan Your Content

    Content is the heart of your YouTube channel. Before uploading your first video, plan your content strategy:

    1. Choose Your Niche: Focus on a specific topic or area of interest, such as tech reviews, cooking, fitness, or education.
    2. Define Your Target Audience: Understand who you’re creating content for and tailor your videos to their preferences.
    3. Create a Content Calendar: Plan your uploads to maintain consistency. Aim for at least one video per week.
    4. Research Popular Topics: Use tools like Google Trends or YouTube’s search bar to find trending topics in your niche.

    Step 5: Create and Upload Your First Video

    Once your channel is set up, it’s time to upload your first video:

    1. Create High-Quality Content: Use a good camera and microphone for better video and audio quality.
    2. Edit Your Video: Use editing software like Adobe Premiere Pro, Final Cut Pro, or free options like DaVinci Resolve.
    3. Add a Title and Description: Write an engaging title that includes your primary keyword. Add a detailed description with relevant keywords.
    4. Use Tags: Add tags to help YouTube’s algorithm understand your content.
    5. Create a Thumbnail: Design an eye-catching thumbnail that encourages viewers to click on your video. Recommended size: 1280 x 720 pixels.
    6. Upload Your Video: Go to your channel, click Create > Upload Video, and follow the prompts.

    Step 6: Optimize Your Channel for Growth

    Optimization is crucial to growing your YouTube channel. Here’s how to do it:

    1. Engage with Your Audience

    1. Respond to comments and interact with viewers.
    2. Encourage viewers to like, comment, and subscribe.

    2. Analyze Performance

    1. Use YouTube Analytics to track your performance.
    2. Monitor metrics like watch time, click-through rate, and audience retention.

    3. Collaborate with Others

    1. Partner with other YouTubers in your niche to reach a wider audience.

    4. Promote Your Channel

    1. Share your videos on social media platforms.
    2. Use email marketing to notify your subscribers about new uploads.

    Step 7: Monetize Your Channel

    Once your channel meets YouTube’s eligibility criteria, you can apply for monetization:

    1. Join the YouTube Partner Program (YPP): Requires 1,000 subscribers and 4,000 watch hours in the past 12 months.
    2. Enable Ads: Set up Google AdSense to earn revenue from ads.
    3. Explore Other Revenue Streams: Consider memberships, merchandise, and sponsorships.

    Tips for Success

    1. Be Consistent: Upload videos regularly to keep your audience engaged.
    2. Focus on Quality: Prioritize creating valuable and entertaining content.
    3. Learn and Adapt: Stay updated on YouTube trends and algorithm changes.

    Conclusion

    Starting a YouTube channel is an exciting journey filled with opportunities to express yourself, share knowledge, and grow a community. By following this guide on how to create a YouTube channel, you can establish a strong foundation for success. Remember, persistence and creativity are key to thriving on YouTube. Start today and let your voice be heard!


  • How to Upgrade to Windows 11 from Windows 10

    How to Upgrade to Windows 11 from Windows 10

    With the release of Windows 11, Microsoft has introduced a fresh, modern design and a range of new features aimed at improving productivity, gaming, and overall user experience. If you’re currently using Windows 10 and wondering how to upgrade to Windows 11 from Windows 10, this guide will walk you through the entire process step by step.


    Why Upgrade to Windows 11?

    Before diving into the upgrade process, let’s explore why you might want to make the switch to Windows 11:

    1. Enhanced User Interface: Windows 11 offers a sleek, centered taskbar, rounded corners, and improved animations for a modern look and feel.
    2. Improved Performance: It is optimized for speed and efficiency, resulting in faster boot times and smoother multitasking.
    3. Gaming Features: With DirectStorage, Auto HDR, and a revamped Xbox app, gamers can enjoy a superior experience.
    4. Productivity Tools: Snap Layouts, Snap Groups, and improved virtual desktops help users organize their workflow more effectively.
    5. Enhanced Security: Windows 11 includes built-in security features such as TPM 2.0 and Secure Boot, ensuring better protection against threats.

    Prerequisites for Upgrading to Windows 11

    Before you begin, make sure your device meets the minimum system requirements for Windows 11:

    • Processor: 1 GHz or faster with at least 2 cores on a compatible 64-bit processor or System on a Chip (SoC).
    • RAM: 4 GB or more.
    • Storage: 64 GB or more.
    • System Firmware: UEFI, Secure Boot capable.
    • TPM: Trusted Platform Module (TPM) version 2.0.
    • Graphics Card: DirectX 12 compatible with WDDM 2.0 driver.
    • Display: High-definition (720p) display, greater than 9″ diagonally.
    • Internet Connection: Required for updates and some features.

    Check System Compatibility

    Microsoft provides a tool called the PC Health Check app to help users determine if their device is eligible for the upgrade. Follow these steps:

    1. Download the PC Health Check app from Microsoft’s official website.
    2. Install and run the app.
    3. Click on Check now to see if your PC meets the requirements.

    If your device isn’t compatible, you may need to upgrade your hardware or stick with Windows 10, which will continue receiving support until October 14, 2025.

    Steps to Upgrade to Windows 11 from Windows 10

    Now that you’ve confirmed compatibility, here’s how to upgrade to Windows 11 from Windows 10:

    1. Back Up Your Data

    While the upgrade process is designed to keep your files and applications intact, it’s always a good idea to back up important data. Use an external hard drive, cloud storage services like OneDrive, or a dedicated backup tool to ensure your files are safe.

    2. Check for Updates in Windows 10

    Before upgrading, ensure your current Windows 10 installation is up to date:

    1. Go to Settings > Update & Security.
    2. Click on Windows Update and then Check for updates.
    3. Install any pending updates and restart your PC if necessary.

    3. Upgrade via Windows Update

    Microsoft offers the easiest way to upgrade to Windows 11 through Windows Update. Here’s how:

    1. Open Settings.
    2. Navigate to Update & Security > Windows Update.
    3. If your device is eligible, you’ll see an option to download and install Windows 11. Click Download and install.
    4. Follow the on-screen instructions to complete the upgrade.

    4. Use the Installation Assistant

    If Windows Update doesn’t offer the upgrade, you can use the Windows 11 Installation Assistant:

    1. Visit Microsoft’s official Windows 11 download page.
    2. Download the Installation Assistant.
    3. Run the tool and follow the prompts to upgrade.

    5. Create Installation Media

    For advanced users, creating a bootable USB drive or DVD is another option:

    1. Download the Media Creation Tool from the Windows 11 download page.
    2. Launch the tool and choose Create installation media.
    3. Select your preferred language, edition, and architecture.
    4. Insert a USB drive with at least 8 GB of free space and follow the prompts to create the installation media.
    5. Use the media to perform an in-place upgrade or a clean install.

    6. Perform a Clean Installation (Optional)

    A clean installation involves wiping your device and starting fresh. While this is more time-consuming, it can improve performance and eliminate unnecessary files:

    1. Back up your data.
    2. Use the installation media created earlier to boot your device.
    3. Follow the on-screen instructions to install Windows 11.

    Post-Upgrade Steps

    After upgrading, take these steps to optimize your experience:

    1. Check for Updates: Go to Settings > Windows Update and install any available updates for Windows 11.
    2. Reinstall Applications: If you performed a clean installation, reinstall your essential software.
    3. Restore Data: Restore files from your backup if necessary.
    4. Explore New Features: Familiarize yourself with features like Snap Layouts, the redesigned Start menu, and widgets.

    Troubleshooting Common Issues

    If you encounter problems during or after the upgrade, try the following:

    • Insufficient Storage: Free up disk space by removing unnecessary files or using an external storage device.
    • Compatibility Errors: Double-check system requirements and update your drivers.
    • Performance Issues: Disable startup programs, update apps, or perform a system scan for malware.
    • Rollback Option: If you’re unhappy with Windows 11, you can revert to Windows 10 within 10 days by going to Settings > System > Recovery.

    Conclusion

    Upgrading to Windows 11 from Windows 10 is a straightforward process that brings a host of benefits, including improved performance, enhanced features, and a modern interface. By following this guide on how to upgrade to Windows 11 from Windows 10, you can make the transition seamlessly. Whether you’re a casual user, a gamer, or a professional, Windows 11 has something to offer for everyone.

  • How to Run Android Apps on Your PC

    How to Run Android Apps on Your PC

    Friends, sometimes we feel that how good it would have been if the android application was also installed in our PC or laptop because it happens that you are working on a laptop and you have your mobile on a charge, and only then your Whatsapp But a message comes and you have to get up to see it, and in doing so you waste a lot of time, this is just one example.

    At that time we think that I wish that it would be nice if we could do all the work from a laptop or PC, but how can we install Android application in Windows? So for this we need Bluestacks. But what is this Bluestacks? So let’s know.

    Bluestacks Software

    Bluestacks is a Windows software with the help of which we can run Android Applications in our laptop or computer, that is, by installing Bluestacks in Windows, we can easily install Android Applications in Bluestacks.

    How To Download Bluestacks App

    Step 1: First you go to the official website of Bluestacks
    Step 2: By going to the website, there will be an option of Download Bluestacks, you have to tap on it.
    Step 3: After this Bluestacks will start downloading in your system, this file will be around 450 MB.
    Step 4: After downloading the Bluestacks file, you have to install it on your laptop or computer.
    Step 5: After installation, open Bluestacks.
    Step 6: As soon as you open it, you will see an option of Install, then tap on it.
    Step 7: After installation, you have to login with your Gmail.

    You will see many Android applications, you can install whatever you want, or there will be an option of search in Bluestacks, you can search and install your app in it.