Increasing the font size in Windows can significantly enhance readability and reduce eye strain, especially for users with visual impairments or those working on high-resolution displays. Whether you’re using Windows 10 or Windows 11, the operating system provides built-in settings to adjust text size to your preference. This guide will walk you through the steps to increase font size in Windows settings, ensuring a more comfortable computing experience.
How to Increase Font Size in Windows 11
Step 1: Access Accessibility Settings
- Click on the Start menu and select Settings.
- In the Settings window, choose Accessibility from the sidebar.
Step 2: Adjust Text Size
- Under the Vision section, click on Text size.
- You’ll see a slider labeled Text size. Drag the slider to the right to increase the font size.
- As you move the slider, a preview will show how the text will appear.
- Once satisfied, click Apply to implement the changes.
Note: Adjusting the text size will affect most system text, but some applications may not reflect the change.
Step 3: Adjust Overall Scaling (Optional)
- If you wish to increase the size of apps and other items along with text:
- Go back to Accessibility settings.
- Click on Display under the Vision section.
- Under Scale & layout, choose a scaling percentage higher than 100% from the dropdown menu.
Note: Increasing the scaling percentage will enlarge all items on the screen, including text, apps, and icons.
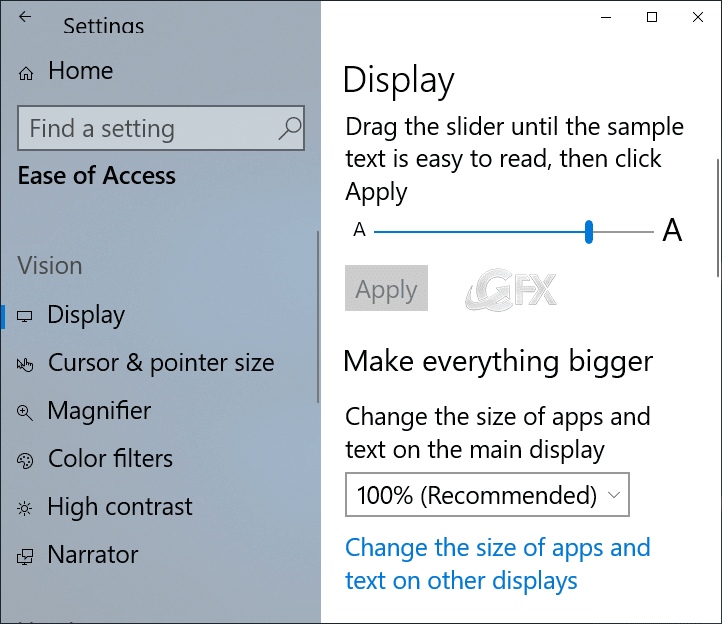
How to Increase Font Size in Windows 10
Step 1: Open Ease of Access Settings
- Right-click on the desktop and select Display settings.
- In the Display settings window, scroll down and click on Ease of Access.
Step 2: Make Text Bigger
- Under the Display section, you’ll find a slider labeled Make text bigger.
- Drag the slider to the right to increase the font size.
- A sample text will show how the adjusted size looks.
- Click Apply to save the changes.
Step 3: Adjust Overall Scaling (Optional)
- To increase the size of apps and other items along with text:
- In the Display settings, under Scale and layout, choose a scaling percentage higher than 100% from the dropdown menu.
Note: Similar to Windows 11, increasing the scaling percentage will enlarge all items on the screen.
Additional Tips
- Use Magnifier: For temporary zooming, Windows offers a built-in Magnifier tool. Press Windows + Plus (+) to activate it. Press Windows + Esc to turn it off.
- Custom Scaling: If predefined scaling options don’t suit your needs, you can set a custom scaling percentage:
- In Display settings, under Scale and layout, click on Advanced scaling settings.
- Enter a custom scaling size between 100% and 500%, then click Apply.
- Sign out and sign back in to apply the changes.
- Third-Party Tools: For more granular control over font sizes, consider using third-party applications like Winaero Tweaker. These tools offer advanced customization options but should be used with caution.
Personal Experience
As someone who spends extended hours in front of a computer screen, adjusting the font size has been crucial for reducing eye fatigue. On my Windows 11 laptop, increasing the text size to 125% provided a noticeable improvement in readability without compromising the overall layout. It’s a simple adjustment that makes a significant difference in daily computing tasks.
Conclusion
Adjusting the font size in Windows is a straightforward process that can greatly enhance your user experience. Whether you’re aiming for better readability or accommodating visual preferences, Windows 10 and 11 offer built-in settings to help you customize text size to your liking. Remember to explore both text size and overall scaling options to find the perfect balance for your needs.