Author: Lucas

  • How to Access God Mode in Windows 11

    How to Access God Mode in Windows 11

    Windows 11, like its predecessors, offers a hidden feature known as God Mode. While the name might sound grand, God Mode is simply a special folder that consolidates over 200 administrative tools, settings, and control panel options into a single, easily accessible location. Think of it as a super-powered Control Panel, offering quick access to a vast array of system configurations that would otherwise require navigating through multiple menus. This can be incredibly useful for power users, system administrators, or anyone who frequently tweaks their Windows settings.

    The term “God Mode” isn’t an official Microsoft designation; it was coined by users after the feature was discovered in Windows Vista. It gained popularity due to its comprehensive nature and the convenience it offered in managing various aspects of the operating system. Despite its unofficial name, the functionality remains a valuable tool for deep system control.

    How to Access God Mode in Windows 11

    Accessing God Mode in Windows 11 is a straightforward process that involves creating a specific folder with a unique name. There’s only one method to enable it, and it’s quite simple.

    Step 1: Create a New Folder

    First, you need to create a new folder on your desktop or in any location you prefer.

    1. Right-click on an empty space on your desktop.
    2. From the context menu, hover over “New”.
    3. Select “Folder”.

    Step 2: Rename the Folder with the God Mode String

    Now, the crucial step is to rename this newly created folder with a specific string of characters. This string acts as a special identifier that Windows recognizes, triggering the God Mode functionality.

    1. Right-click on the newly created folder.
    2. Select “Rename”.
    3. Copy and paste (or type exactly) the following string as the new folder name:
    4. GodMode.{ED7BA470-8E54-465E-825C-99712043E01C}
      • Explanation of the String:
        • GodMode: This part is the display name for your God Mode folder. You can actually change this to anything you like (e.g., “MySettings”, “AdminTools”), but “GodMode” is the widely recognized and convenient name.
        • {ED7BA470-8E54-465E-825C-99712043E01C}: This is a Globally Unique Identifier (GUID). A GUID is a 128-bit number used to identify information in computer systems. In this case, it’s a specific GUID that Windows associates with the God Mode functionality. When Windows sees a folder named with a display name followed by this particular GUID, it automatically transforms it into the God Mode shortcut.

    Step 3: Access God Mode

    Once you’ve renamed the folder, you’ll notice a change in its icon. The folder icon will transform into a Control Panel-like icon, and the name “GodMode” (or whatever you chose) will disappear, leaving only the icon.

    1. Double-click on the newly transformed God Mode icon.

    You will now see a window open, displaying a comprehensive list of all the administrative tools and settings neatly categorized.

    What You’ll Find in God Mode

    God Mode provides a centralized hub for a wide range of Windows settings, including:

    • Administrative Tools: Event Viewer, Performance Monitor, Services, Task Scheduler, Computer Management, etc.
    • AutoPlay: Configure default actions for different media types.
    • Backup and Restore (Windows 7): Legacy backup options.
    • BitLocker Drive Encryption: Manage encryption for your drives.
    • Color Management: Configure color profiles for your display.
    • Credential Manager: Manage saved usernames and passwords.
    • Date and Time: Adjust system date, time, and time zones.
    • Devices and Printers: Manage connected hardware.
    • Ease of Access Center: Accessibility options for users with disabilities.
    • File Explorer Options: Customize File Explorer behavior.
    • Fonts: Install, view, and manage fonts.
    • Indexing Options: Configure Windows Search indexing.
    • Internet Options: Configure web browser settings.
    • Keyboard: Adjust keyboard settings.
    • Mouse: Configure mouse settings.
    • Network and Sharing Center: Manage network connections.
    • Power Options: Configure power plans and settings.
    • Programs and Features: Uninstall programs, turn Windows features on or off.
    • Recovery: Access system restore points and other recovery options.
    • Remote Desktop Connection: Configure remote access.
    • Security and Maintenance: View security status and maintenance messages.
    • Sound: Adjust audio devices and settings.
    • Speech Recognition: Configure speech recognition.
    • Storage Spaces: Manage storage pools and virtual disks.
    • Sync Center: Configure file synchronization.
    • System: View system information and advanced settings.
    • Taskbar and Navigation: Customize taskbar behavior.
    • Troubleshooting: Run troubleshooting wizards.
    • User Accounts: Manage user accounts and parental controls.
    • Windows Defender Firewall: Configure firewall settings.
    • Windows Tools: Access various system utilities.

    This extensive list demonstrates the power and convenience of God Mode. Instead of digging through the Settings app or the traditional Control Panel, you can quickly locate and adjust almost any system setting from a single window.

    Why is God Mode Important?

    God Mode offers several significant advantages for Windows 11 users:

    • Efficiency: It streamlines access to frequently used and even obscure settings, saving time and clicks. For power users who regularly tweak system configurations, this is invaluable.
    • Centralized Control: Instead of remembering where each setting is located across various menus, God Mode brings them all under one roof. This reduces the cognitive load of managing your system.
    • Discovery of Settings: Many users might not even be aware of the full range of customization options available in Windows. God Mode exposes these settings, allowing for greater control and personalization.
    • Troubleshooting: When encountering an issue, having quick access to various diagnostic and configuration tools can significantly speed up the troubleshooting process.
    • Historical Context: While seemingly a minor feature, God Mode’s persistent presence across multiple Windows versions (from Vista onwards) highlights Microsoft’s underlying architecture that allows such a consolidation of settings through specific GUIDs. It’s a testament to the flexibility of the Windows operating system for advanced users.

    Frequently Asked Questions (FAQ)

    Q1: Is God Mode safe to use?

    Yes, God Mode is completely safe to use. It’s not a hack or a third-party tool. It’s a built-in, albeit hidden, feature of Windows that simply provides a consolidated view of existing system settings. Enabling God Mode itself does not alter your system; it just makes existing options more accessible. However, changing settings within God Mode carries the same risks as changing them through the regular Control Panel or Settings app – exercise caution when modifying unfamiliar settings.

    Q2: Can God Mode break my Windows 11 installation?

    God Mode itself cannot break your Windows 11 installation. It’s merely a shortcut to settings. Any issues would arise from making incorrect or incompatible changes to the system settings through God Mode, just as they could if you made those changes through the standard Windows interface. Always know what a setting does before changing it.

    Q3: Can I customize the name of the God Mode folder?

    Yes, you can customize the name of the God Mode folder. While “GodMode” is the common and default display name, you can replace “GodMode” in the string with any name you prefer, such as “MyTools,” “AdminPanel,” or “SuperSettings.” The crucial part is keeping the GUID {ED7BA470-8E54-465E-825C-99712043E01C} exactly as it is.

    Q4: Does God Mode offer more settings than the regular Control Panel or Settings app?

    No, God Mode does not offer more settings than what’s already available in Windows 11. Instead, it offers a consolidated and organized view of settings that are typically scattered across the traditional Control Panel, the modern Settings app, and various administrative tools. It’s about convenience and discoverability, not about unlocking new functionalities.

    Q5: Can I create multiple God Mode folders?

    Yes, you can create multiple God Mode folders if you wish. Each folder will function identically, providing access to the same comprehensive list of settings. There’s no practical benefit to having multiple God Mode folders, but Windows allows it.

    Q6: Why is it called “God Mode”?

    The name “God Mode” is an unofficial, user-coined term. It emerged when the feature was discovered in Windows Vista. The moniker stuck because it provides a single point of access to an extensive array of system controls, giving users a “god-like” level of control over their operating system. Microsoft has never officially used or endorsed this name.

  • How to Fix Slow Startup Issue in Windows 11/10

    How to Fix Slow Startup Issue in Windows 11/10

    A slow startup can be one of the most frustrating issues for any Windows user. What begins as a quick boot-up time often deteriorates over months or years, leaving you waiting minutes instead of seconds to access your desktop. This sluggishness typically stems from a combination of factors, including:

    • Excessive Startup Programs: Many applications automatically configure themselves to launch with Windows, consuming valuable system resources (CPU, RAM, disk I/O) from the moment your PC powers on.
    • Fragmented or Full Storage Drives: Especially on traditional Hard Disk Drives (HDDs), fragmented data can slow down read times during boot. Solid State Drives (SSDs), while faster, can also see performance degradation if they are nearly full.
    • Outdated or Corrupted Drivers: Device drivers are critical software components that allow your hardware to communicate with Windows. Outdated or corrupted drivers can cause conflicts and delays during startup.
    • Windows Updates and System Files: Sometimes, incomplete updates or corrupted system files can lead to prolonged boot sequences as Windows tries to resolve issues.
    • Power Settings: Incorrect power management settings can sometimes interfere with optimal startup performance.
    • Malware or Bloatware: Malicious software or unnecessary pre-installed applications (bloatware) can run hidden processes that bog down your system.

    The good news is that for most cases of slow startup, you don’t need to be a tech expert or download complex third-party tools. Both Windows 10 and Windows 11 provide a robust set of built-in features and settings that allow you to diagnose and fix these issues, restoring your PC to its former speed.

    This guide will walk you through systematic steps to identify and resolve slow startup problems on your Windows 11 or Windows 10 computer.

    Method 1: Managing Startup Programs (Most Effective)

    The single biggest culprit for slow boot times is often an excessive number of applications launching automatically.

    1. Open Task Manager:
      • Press Ctrl + Shift + Esc on your keyboard.
      • Alternatively, right-click on the Start button and select “Task Manager.”
    2. Navigate to the “Startup” Tab:
      • In Task Manager, click on the “Startup” tab (in Windows 10) or “Startup apps” tab (in Windows 11).
    3. Identify and Disable Unnecessary Apps:
      • Review the list of applications that launch with Windows.
      • Pay close attention to the “Startup impact” column (in Windows 10) or “Impact” column (in Windows 11). Apps labeled “High” have the most significant effect on boot time.
      • For any application you don’t absolutely need running immediately after you log in (e.g., game launchers like Steam, communication apps like Discord, cloud sync services you don’t use constantly, Spotify, Adobe Creative Cloud apps), right-click on its entry and select “Disable.”
      • Crucially: Avoid disabling critical system processes, your antivirus software, or essential drivers. If you’re unsure about an app, search for its name online.

    Method 2: Adjusting Power Options and Disabling Fast Startup

    While “Fast Startup” is designed to make your PC boot quicker, it can sometimes cause issues or conflicts, leading to longer boot times or problems for some users. It’s worth testing if disabling it helps.

    1. Access Power Options:
      • In Windows 11: Right-click on the Start button > “Settings” > “System” > “Power & battery.” Scroll down and click on “Power mode” or “Additional power settings.”
      • In Windows 10: Right-click on the Start button > “Power Options” (or go to Settings > System > Power & sleep > Additional power settings).
    2. Choose What Power Buttons Do:
      • In the Power Options window, click “Choose what the power buttons do” on the left-hand pane.
    3. Disable Fast Startup:
      • Click “Change settings that are currently unavailable.” (You may need Administrator privileges).
      • Scroll down and uncheck the box next to “Turn on fast startup (recommended).”
      • Click “Save changes.”
      • Test: Restart your PC and observe if the boot time has improved.

    Method 3: Updating Drivers and Windows

    Outdated or corrupted drivers can cause system instability and slow down the boot process. Keeping your Windows operating system updated is also crucial for performance improvements and bug fixes.

    1. Update Device Drivers:
      • Graphics Drivers: These are often a source of boot issues. Visit the website of your graphics card manufacturer (NVIDIA, AMD, Intel) and download the latest drivers for your specific model.
      • Other Drivers:
        • Search for “Device Manager” in the Windows Search bar and open it.
        • Expand categories (e.g., “Display adapters,” “Network adapters,” “Sound, video and game controllers”).
        • Right-click on a device and select “Update driver.” Choose “Search automatically for drivers.” If that doesn’t find it, visit your laptop/motherboard manufacturer’s support website and download the latest drivers for your model.
    2. Check for Windows Updates:
      • Windows 11: Go to Settings > Windows Update. Click “Check for updates.”
      • Windows 10: Go to Settings > Update & Security > Windows Update. Click “Check for updates.”
      • Install any pending updates and restart your PC as prompted.

    Method 4: Cleaning Up and Optimizing Storage Drives

    A cluttered or fragmented hard drive, or a nearly full SSD, can lead to slower boot times.

    1. Run Disk Cleanup:
      • This tool helps remove temporary files, system logs, and other unnecessary data.
      • Press Windows key + R to open the Run dialog.
      • Type cleanmgr and press Enter.
      • Select your C: drive (or the drive where Windows is installed) and click “OK.”
      • Click “Clean up system files” for a more thorough scan.
      • Select all the file types you wish to remove (especially “Temporary files,” “Downloads,” “Recycle Bin,” and “Windows Update Cleanup”).
      • Click “OK” and then “Delete Files.”
    2. Optimize Drives (Defragment/Trim):
      • For HDDs (Hard Disk Drives): Defragmentation organizes fragmented data, improving access speeds.
      • For SSDs (Solid State Drives): The “Optimize Drives” tool performs TRIM, which helps maintain SSD performance over time. Windows usually schedules this automatically.
      • How to: Search for “Defragment and Optimize Drives” in the Windows Search bar and open it.
      • Select your C: drive.
      • Click “Optimize.” You can also check “Change settings” to adjust the automatic optimization schedule.

    Method 5: Disabling Unnecessary Services

    Some Windows services might be running automatically but aren’t essential for your daily use, consuming resources during startup. Use caution here, as disabling critical services can cause system instability.

    1. Open Services Manager:
      • Press Windows key + R to open the Run dialog.
      • Type services.msc and press Enter.
    2. Identify Non-Essential Services:
      • Review the list of services. Look for services that are set to “Automatic” but are not critical for your system or apps you frequently use.
      • Examples of potentially safe services to disable (after research): Fax, Print Spooler (if you don’t print), Secondary Logon, Xbox services (if you don’t game on PC).
      • Always research a service before disabling it. Incorrectly disabling a service can cause serious system problems.
    3. Disable or Set to Manual:
      • Right-click on the service you want to change.
      • Select “Properties.”
      • In the “Startup type” dropdown, change it from “Automatic” to “Manual” or “Disabled.”
      • Click “Apply” and “OK.”
      • If the service is currently running and you’ve set it to Manual/Disabled, you may also click “Stop” to stop it immediately.

    Method 6: Checking for Malware

    Malware or unwanted software can run hidden processes that severely impact startup and overall performance.

    1. Run a Full System Scan:
      • Use Windows Security (formerly Windows Defender), which is built into Windows 10 and 11.
      • How to: Search for “Windows Security” in the Windows Search bar and open it.
      • Go to “Virus & threat protection.”
      • Click “Scan options” and select “Full scan.”
      • Click “Scan now” and allow the scan to complete. This can take a long time.
      • If any threats are found, follow the instructions to remove them.

    Method 7: System File Checker (SFC) and DISM Scans

    Corrupted Windows system files can lead to instability and slow performance, including during startup.

    1. Open Command Prompt as Administrator:
      • Search for “cmd” in the Windows Search bar.
      • Right-click on “Command Prompt” and select “Run as administrator.”
    2. Run System File Checker (SFC):
      • In the Command Prompt window, type sfc /scannow and press Enter.
      • This tool scans for and repairs corrupted Windows system files. Let the scan complete (it can take some time).
      • If it finds and fixes issues, you may be prompted to restart.
    3. Run Deployment Image Servicing and Management (DISM) Tool (If SFC fails):
      • If SFC reports that it couldn’t fix certain files, run DISM.
      • In the same Administrator Command Prompt, type the following commands one by one, pressing Enter after each:
        • DISM /Online /Cleanup-Image /CheckHealth (Checks for corruption)
        • DISM /Online /Cleanup-Image /ScanHealth (Performs a more advanced scan)
        • DISM /Online /Cleanup-Image /RestoreHealth (Repairs corrupted files using Windows Update)
      • This process can also take a while. After it completes, run sfc /scannow again.

    Conclusion

    A slow startup in Windows 11 or Windows 10 is a common but fixable issue. By systematically applying the built-in optimization tools and troubleshooting methods – from meticulously managing startup programs and updating drivers to cleaning up your storage and checking for malware – you can significantly reduce your boot time. Regular maintenance and being mindful of what programs launch automatically are key to keeping your PC performing optimally from the moment you press the power button.

    FAQ Section

    Q1: What is “Fast Startup” in Windows 11/10 and should I disable it?

    Fast Startup (also known as “hybrid shutdown”) is a feature that combines aspects of a cold shutdown and hibernation. When you shut down your PC, it saves the system state to a hibernation file, allowing for a quicker boot-up. While often beneficial, it can sometimes cause issues with hardware or drivers, leading to longer boot times or other problems. If you’re experiencing slow startup, it’s worth trying to disable it (Method 2) to see if it improves your boot performance.

    Q2: Will disabling startup apps delete them from my computer?

    No, disabling startup apps only prevents them from launching automatically when Windows starts. It does not uninstall the applications or delete any of their files. You can still open and use these applications manually whenever you need them.

    Q3: How do I know which startup apps are safe to disable?

    When reviewing the “Startup apps” tab in Task Manager, look for familiar applications you installed (e.g., game launchers, messaging apps, cloud sync clients you don’t need constantly running). Windows also provides an “Impact” column (Windows 11) or “Startup impact” (Windows 10) that helps identify resource-heavy apps. Generally, avoid disabling anything related to your operating system, security software (antivirus), or essential hardware drivers unless you are absolutely sure what it does. When in doubt, search for the app’s name online.

    Q4: Does upgrading from an HDD to an SSD significantly improve startup time?

    Yes, upgrading from a traditional Hard Disk Drive (HDD) to a Solid State Drive (SSD) for your operating system is arguably the most impactful upgrade you can make to drastically improve startup times and overall system responsiveness. SSDs have no moving parts and offer significantly faster read/write speeds than HDDs.

    Q5: What is the purpose of “Wipe Cache Partition” on phones versus “Disk Cleanup” on Windows?

    While both clear temporary files, their scope and method differ. “Wipe Cache Partition” on a phone (Android) clears the system cache specifically for the Android OS, which can become corrupted after updates. Disk Cleanup (Windows) is a utility that removes various temporary files, downloaded program files, Recycle Bin contents, and old Windows Update files from your hard drive. They both aim to clear unneeded temporary data but operate on different system architectures.

  • How to Speed Up Slow Windows 11 Laptop

    How to Speed Up Slow Windows 11 Laptop

    Even a brand-new Windows 11 laptop can start feeling sluggish over time. This slowdown isn’t necessarily due to faulty hardware but often stems from software accumulation, inefficient settings, or improper maintenance. Common reasons for a slow Windows 11 experience include:

    • Too many startup programs: Applications configured to launch automatically when you boot your laptop can consume significant resources (RAM and CPU) before you even start working.
    • Insufficient storage space: When your main drive (especially the C: drive) is nearly full, Windows struggles to perform essential tasks like creating temporary files, updating, and operating efficiently.
    • Excessive temporary files and cache: Over time, your system and applications generate numerous temporary files, browser caches, and old update files that can clutter your storage and slow down access.
    • Background processes: Many applications continue to run in the background, consuming CPU cycles and RAM even when you’re not actively using them.
    • Outdated drivers or operating system: Old drivers can cause performance bottlenecks or instability. Missing Windows updates might mean you’re lacking crucial performance optimizations or bug fixes.
    • Visual effects: Windows 11 features sleek animations and visual effects that, while aesthetically pleasing, can strain lower-end hardware.
    • Malware or viruses: Malicious software can run hidden processes, consume resources, and compromise system performance.
    • Fragmented hard drive (for HDDs): While less of an issue for SSDs, traditional Hard Disk Drives (HDDs) can become fragmented, meaning data is scattered across the disk, leading to slower read/write times.
    • Aging hardware: Eventually, even with perfect software optimization, older hardware may simply not keep up with the demands of modern software and operating systems.

    Understanding these underlying causes is the first step in effectively troubleshooting and speeding up your Windows 11 laptop.

    The Evolution of PC Performance Optimization: From the early days of computing, managing system resources has been key to performance. Tools like Disk Defragmenter, first popularized in MS-DOS and Windows 95, were essential for HDDs. The shift to Solid State Drives (SSDs) significantly reduced the need for defragmentation. Modern operating systems like Windows 11 now focus more on background process management, startup optimization, and cloud-based features to maintain responsiveness, reflecting a broader trend towards highly integrated and automatically managed computing environments.

    How to Speed Up a Slow Windows 11 Laptop

    Here’s a comprehensive guide to optimizing your Windows 11 laptop for better performance, from simple tweaks to deeper system adjustments.

    Step 1: Restart Your Laptop Regularly

    This is the simplest yet often most effective first step. A restart clears temporary files, closes unnecessary background processes, and refreshes system memory.

    • Action: Click the Start button, then the Power icon, and select “Restart.”
    • Frequency: Make it a habit to restart your laptop at least once a day, or if you notice it’s starting to slow down. Avoid simply closing the lid, which often just puts it to sleep.

    Step 2: Manage Startup Apps

    Too many programs launching with Windows can significantly prolong boot times and consume resources immediately.

    • How to Access Startup Apps:
      1. Right-click the Start button (or press Windows key + X).
      2. Select “Task Manager.”
      3. In Task Manager, click on the “Startup apps” tab.
    • How to Disable:
      1. You’ll see a list of applications and their “Startup impact.”
      2. Identify apps you don’t need to run immediately when Windows starts (e.g., Spotify, Steam, Adobe Creative Cloud apps, messaging clients, cloud sync tools if you don’t use them constantly).
      3. Right-click on the app you want to disable and select “Disable.”
    • Action: Disable anything that doesn’t need to run from the moment you log in. This will free up RAM and CPU cycles. You can always launch these apps manually when you need them.

    Step 3: Free Up Disk Space

    A full drive can severely hamper Windows 11’s performance, especially if it’s an SSD (Solid State Drive). Aim to keep at least 15-20% of your primary drive (C:) free.

    • Using Disk Cleanup:
      1. Action: Search for “Disk Cleanup” in the Windows Search bar and open it.
      2. Select your C: drive and click “OK.”
      3. Action: Let it scan. Then, click “Clean up system files.”
      4. Select the C: drive again.
      5. Check boxes next to items you want to remove (e.g., Temporary Internet Files, Recycle Bin, Temporary files, Windows Update Cleanup, Delivery Optimization Files). Be cautious with “Downloads” if you have important files there.
      6. Click “OK” and then “Delete Files.”
    • Uninstall Unused Programs:
      1. Action: Go to Settings > Apps > Installed apps.
      2. Scroll through the list and uninstall any programs you no longer use. Right-click on the app and select “Uninstall.”
    • Move Large Files: Transfer large files (videos, photos, old games) from your C: drive to an external hard drive or cloud storage.
    • Action: Regularly check your storage status by going to Settings > System > Storage. This gives you a visual breakdown of what’s consuming space.

    Step 4: Adjust Visual Effects for Performance

    Windows 11 boasts a sleek interface with animations and transparency, which can impact performance on less powerful hardware.

    • How to Adjust:
      1. Action: Search for “Adjust the appearance and performance of Windows” in the Windows Search bar and open it.
      2. In the “Performance Options” window, select the “Visual Effects” tab.
      3. Action: Choose “Adjust for best performance.” This will disable most animations and visual flair.
      4. Alternatively, select “Custom” and uncheck effects you don’t need (e.g., “Animate windows when minimizing and maximizing,” “Fade or slide menus into view,” “Smooth-scroll list boxes”).
      5. Click “Apply,” then “OK.”

    Step 5: Update Drivers and Windows 11

    Outdated or corrupted drivers can cause slowdowns and system instability. Keeping Windows 11 itself updated ensures you have the latest performance optimizations and bug fixes.

    • Update Windows 11:
      1. Action: Go to Settings > Windows Update.
      2. Click “Check for updates.”
      3. Action: Download and install any available updates. Restart your laptop if prompted.
    • Update Device Drivers:
      1. Action: Go to Settings > Windows Update > Advanced options > Optional updates. Check for any available driver updates and install them.
      2. For Graphics Drivers: Visit the website of your graphics card manufacturer (NVIDIA, AMD, Intel) to download the latest drivers directly. These often provide significant performance improvements for gaming and intensive applications.
      3. For other drivers: If you suspect a specific component (e.g., Wi-Fi, audio) is causing issues, visit your laptop manufacturer’s website (Dell, HP, Lenovo, ASUS, Acer, etc.) and download the latest drivers for your specific model.
    • Action: Ensure your system is always running the most current software and drivers.

    Step 6: Manage Background Apps

    Many apps continue to run in the background even after you close them, consuming resources.

    • How to Manage:
      1. Action: Go to Settings > Apps > Apps & features. (For Windows 11, it’s “Installed apps”).
      2. Click the three vertical dots next to an app, select “Advanced options” (if available).
      3. Action: Under “Background app permissions,” choose “Never” for apps you don’t need running in the background. Or, select “Optimized for performance” if available.
    • Task Manager for Real-Time Monitoring:
      1. Action: Right-click the Start button > “Task Manager.”
      2. In the “Processes” tab, sort by “CPU,” “Memory,” or “Disk” usage to identify resource-hungry applications.
      3. Action: If you find an app consuming excessive resources and you’re not actively using it, select it and click “End task” (but be careful not to end system processes).
    • Action: Be selective about which apps are allowed to run in the background.

    Step 7: Check for and Remove Malware

    Malware can significantly slow down your system and compromise your security.

    • Using Windows Security:
      1. Action: Go to Settings > Privacy & security > Windows Security.
      2. Click “Virus & threat protection.”
      3. Click “Quick scan” or “Scan options” for a full scan.
    • Third-Party Antivirus (Optional): If you suspect a stubborn infection, consider a full scan with a reputable third-party antivirus program like Malwarebytes, Avast, or Bitdefender.
    • Action: Regularly scan your system for threats and remove any found.

    Step 8: Disable Unnecessary Notifications and Tips

    Constant notifications and system tips can be distracting and use up background resources.

    • How to Disable:
      1. Action: Go to Settings > System > Notifications.
      2. Toggle off notifications for apps you don’t need alerts from.
      3. Action: Scroll down and uncheck “Offer suggestions on how I can set up my device” and “Get tips and suggestions when I use Windows.”
    • Action: This can reduce background activity and system interruptions.

    Step 9: Optimize Drives (Defragment or Trim)

    This step helps organize data on your storage drive for faster access.

    • For HDDs (Hard Disk Drives):
      1. Action: Search for “Defragment and Optimize Drives” in Windows Search and open it.
      2. Select your C: drive (or any HDD).
      3. Click “Optimize.”
    • For SSDs (Solid State Drives):
      1. Action: For SSDs, Windows automatically performs TRIM operations, which optimize performance. You typically don’t need to manually defragment an SSD. The “Optimize” tool will correctly run TRIM for SSDs.
    • Action: Run this optimization periodically, especially for HDDs.

    Step 10: Adjust Power Mode

    Your laptop’s power settings can impact performance.

    • How to Adjust:
      1. Action: Click the Battery icon in the taskbar.
      2. Adjust the Power mode slider to “Best performance” or “Best power efficiency” depending on your needs. For speed, choose “Best performance.”
      3. Action: For more granular control, go to Settings > System > Power & battery > Power mode.
    • Action: Keep in mind that “Best performance” will consume more battery power.

    Step 11: Consider Hardware Upgrades (If Software Fixes Fail)

    If your Windows 11 laptop remains persistently slow despite all software optimizations, your hardware might be the bottleneck.

    • Upgrade to an SSD: If your laptop still uses a traditional HDD (Hard Disk Drive), upgrading to an SSD (Solid State Drive) is the single most impactful upgrade for performance. SSDs are exponentially faster than HDDs.
    • Increase RAM: If you frequently multitask or use demanding applications, increasing your RAM (Random Access Memory) (e.g., from 8GB to 16GB) can significantly improve responsiveness and prevent slowdowns.
    • Action: Consult your laptop’s manufacturer or a computer technician to determine compatible upgrade options.

    Frequently Asked Questions (FAQ)

    Q1: Why is my new Windows 11 laptop already slow?

    Even new laptops can be slow due to:

    • Bloatware: Pre-installed, unnecessary software from the manufacturer.
    • Too many startup apps: Many apps configure themselves to run at startup by default.
    • Updates: Large Windows updates can temporarily slow down a system while they integrate.
    • Default settings: Windows 11’s default visual effects can be taxing on entry-level hardware.
    • HDD instead of SSD: Some entry-level laptops still come with slower HDDs.

    Q2: Will freeing up disk space really speed up my laptop?

    Yes, absolutely. When your primary drive (especially the C: drive) is nearly full, Windows struggles to manage temporary files, perform updates, and use virtual memory (paging file) efficiently. Keeping adequate free space (ideally 15-20% or more) is crucial for smooth operation.

    Q3: How much RAM do I need for Windows 11 to run smoothly?

    While Windows 11 officially requires a minimum of 4GB RAM, 8GB is considered the practical minimum for smooth general use, multitasking, and web Browse. For demanding tasks like gaming, video editing, or graphic design, 16GB or more is highly recommended.

    Q4: Should I disable Windows animations to speed up my laptop?

    If your laptop has limited resources (e.g., 4GB-8GB RAM, older CPU, or integrated graphics), disabling visual effects and animations (like transparency and fading effects) can indeed free up system resources and make the interface feel snappier and more responsive.

    Q5: Is it better to “Cloud download” or “Local reinstall” when resetting Windows 11 for speed? A5: For optimal speed and to ensure you’re starting with the cleanest possible system, “Cloud download” is generally preferred. It downloads a fresh, untainted copy of Windows, bypassing any potential corruption in your local recovery files. However, it requires a stable and reasonably fast internet connection.

    Q6: Can malware cause my Windows 11 laptop to slow down significantly? A6: Yes, definitively. Malware and viruses often run hidden processes in the background, consume excessive CPU and RAM, generate network traffic, or interfere with system functions, all of which can lead to a significant slowdown of your Windows 11 laptop. Regular scans with reputable antivirus software are essential.


  • How to Move Files from C drive to D drive Safely

    How to Move Files from C drive to D drive Safely

    Is your C drive running out of space? Many Windows users face this common problem. The C drive is typically where your operating system, programs, and often, your personal files reside. As you accumulate more documents, photos, videos, and downloads, your C drive can become sluggish, impacting your computer’s performance. Moving files from your C drive to D drive safely is an excellent way to free up space and optimize your system without deleting anything important.

    The concept of organizing data across different storage locations has been around since the earliest days of computing. Initially, computers had single hard drives, and as they grew larger, users started partitioning them or adding secondary drives to separate the operating system from personal data. This practice, often involving a C drive for system files and a D drive for user data, became a standard in Windows environments. This not only helps with organization but also simplifies data backup and recovery, as your personal files are separate from the system files.

    Understanding Your Drives: C Drive vs. D Drive

    Before we dive into the “how-to,” let’s quickly clarify what we mean by C drive and D drive.

    • C Drive (System Drive): This is the primary partition on your hard drive, where Windows is installed. It also stores program files and often serves as the default location for user data. Because the operating system constantly interacts with this drive, keeping it lean is crucial for performance.
      • Entity: The C drive is conventionally assigned as the primary partition that houses the operating system (like Windows) and essential system files. It’s often referred to as the “system drive” or “boot drive.”
    • D Drive (Data Drive/Secondary Drive): This is typically a secondary partition on the same physical hard drive, or it could be an entirely separate physical hard drive. It’s commonly used for storing personal files, games, large applications, and backups, thereby offloading data from the C drive.
      • Entity: The D drive is usually a secondary partition or a separate physical hard drive used for data storage. It helps in segregating user files from system files, which can improve system performance and simplify data management.

    The goal of moving files is to free up valuable space on your C drive, leading to a faster and more stable computer.

    Method 1: Manually Moving Files and Folders with File Explorer

    This is the most straightforward method for general files like documents, photos, and videos. It’s safe as long as you’re not moving program files or system-critical folders.

    Step-by-Step Guide:

    1. Open File Explorer: Press the Windows key + E on your keyboard, or click the folder icon on your taskbar.
    2. Navigate to the C Drive: In the left-hand pane, click on This PC” or “My Computer.” Then, double-click on your C drive (usually labeled “Local Disk (C:)”).
    3. Identify Files to Move: Browse through your folders to find the files or folders you want to move. Common locations for large user files include:
      • C:\Users\[YourUsername]\Documents
      • C:\Users\[YourUsername]\Pictures
      • C:\Users\[YourUsername]\Videos
      • C:\Users\[YourUsername]\Downloads
      • C:\Users\[YourUsername]\Desktop
    4. Select the Files/Folders:
      • To select a single file or folder, click on it.
      • To select multiple files/folders, hold down the Ctrl key and click on each item.
      • To select a range of files, click the first item, hold down the Shift key, and click the last item.
      • To select all items in a folder, press Ctrl + A.
    5. Cut the Selected Items: Once selected, right-click on any of the highlighted items and choose “Cut” from the context menu. (Using “Cut” ensures the files are removed from the original location after pasting, preventing duplicates and freeing up space).
    6. Navigate to the D Drive: In the left-hand pane of File Explorer, click on your D drive (e.g., “New Volume (D:)”).
    7. Create a New Folder (Optional, but Recommended): To keep your D drive organized, it’s a good idea to create a new folder for the moved files. Right-click on an empty space within the D drive, select “New”, and then “Folder.” Give it a descriptive name (e.g., “My Documents,” “Photos from C”).
    8. Paste the Files: Open the newly created folder (or any existing folder on your D drive where you want to place the files). Right-click on an empty space and choose “Paste.”
    9. Verify the Move: After the files have been pasted, go back to the original location on your C drive to confirm that the files are no longer there. This confirms they have been successfully moved, not copied.

    Safety Tip: Always avoid moving essential system files or program files using this method. Moving these can cause your operating system or applications to malfunction. Stick to personal documents, media, and downloads.

    Method 2: Changing Default Save Locations for User Folders

    Windows allows you to easily change the default location for common user folders like Documents, Pictures, Videos, Music, and Downloads. This ensures that any new files saved to these locations will automatically go to your D drive, preventing future C drive clutter.

    Step-by-Step Guide:

    1. Open File Explorer: Press Windows key + E.
    2. Navigate to Your User Profile: In the left-hand pane, click on “This PC.” Then, navigate to C:\Users\[YourUsername]. You will see folders like “Documents,” “Downloads,” “Music,” “Pictures,” and “Videos.”
    3. Right-Click a User Folder: Right-click on the user folder you want to move (e.g., “Documents”).
    4. Select “Properties”: From the context menu, select “Properties.”
    5. Go to the “Location” Tab: In the Properties window, click on the “Location” tab.
    6. Click “Move…”: You will see the current path (e.g., C:\Users\[YourUsername]\Documents). Click the “Move…” button.
    7. Select a New Location on D Drive: A new window will open. Navigate to your D drive. You can choose to place the folder directly on D or create a new folder (e.g., D:\Documents) specifically for it. Select the desired location and click “Select Folder.”
    8. Confirm the Move: Back in the “Location” tab, the path will now show the new D drive location. Click “Apply.”
    9. Confirm File Transfer: Windows will ask if you want to move all files from the old location to the new location. Click “Yes.” This will safely transfer your existing files.
    10. Repeat for Other Folders: Repeat these steps for other user folders (Pictures, Videos, Music, Downloads, Desktop) as needed.

    Benefit: This method is highly recommended as it automates future file saving, keeping your C drive tidy without manual intervention.

    Method 3: Moving Installed Programs and Apps (Advanced)

    Moving installed programs and apps is trickier than moving personal files. Simply cutting and pasting program folders will likely break them, as they often have registry entries and dependencies tied to their original installation path. However, there are safer methods for certain types of applications.

    Option A: Using Windows Settings (for Microsoft Store Apps)

    For applications installed from the Microsoft Store, Windows provides a built-in option to move them.

    1. Open Settings: Press Windows key + I to open Settings.
    2. Go to “Apps” > “Apps & features”: In the Settings window, click on “Apps,” then select “Apps & features” from the left-hand menu.
    3. Select the App: Find the Microsoft Store app you want to move in the list.
    4. Click “Move”: Click on the app name, and then click the “Move” button.
    5. Choose D Drive: Select your D drive from the dropdown menu and click “Move.”

    Considerations: This only works for apps from the Microsoft Store. Regular desktop programs (like Adobe Photoshop, Microsoft Office, etc.) cannot be moved this way.

    Option B: Reinstalling Programs (Recommended for Desktop Apps)

    For traditional desktop programs, the safest and most reliable method is to uninstall them from the C drive and then reinstall them onto the D drive.

    1. Uninstall the Program:
      • Open Settings (Windows key + I).
      • Go to “Apps” > “Apps & features.”
      • Find the program you want to move, click on it, and select “Uninstall.” Follow any on-screen prompts.
    2. Reinstall on D Drive:
      • Locate the installation file (setup.exe) for the program.
      • Run the installer.
      • During the installation process, when prompted to choose an installation directory, select a location on your D drive (e.g., D:\Program Files or D:\Games).
      • Complete the installation.

    Why Reinstall? Programs create various files and registry entries during installation that are tied to their specific location. Simply moving them breaks these links, causing the program to fail. Reinstallation correctly sets up all necessary components in the new location.

    Option C: Using a Third-Party Program Mover (Use with Caution)

    There are third-party tools designed to move installed programs, but they are not always foolproof and can sometimes cause issues. Examples include utilities within software like Steam (for Steam games only) or some dedicated “app mover” tools.

    • Steam Games: If you have Steam games, you can change their installation location within the Steam client. Go to Steam > Settings > Downloads > Steam Library Folders. You can add a new library folder on your D drive and then move existing games to it.
    • Other Tools: Some software offers “program moving” features. If you decide to use such a tool, proceed with extreme caution and create a system restore point first. These tools attempt to update registry entries and shortcuts, but they don’t always succeed perfectly.

    General Rule: If a program doesn’t have a built-in “move” option, reinstalling is the safest bet.

    The Importance of Disk Management

    Moving files and applications between drives is a core aspect of disk management. Efficient disk management ensures your computer runs smoothly, prevents frustrating slowdowns, and helps prolong the life of your storage devices. An overcrowded C drive not only impacts performance but can also prevent critical Windows updates from installing, leading to security vulnerabilities. By regularly managing your disk space and strategically placing files on the appropriate drives, you contribute to the overall health and longevity of your system. This practice is particularly important with Solid State Drives (SSDs) commonly used for the C drive, as they can perform optimally when they have a certain percentage of free space.

    Frequently Asked Questions (FAQ)

    Q1: Is it safe to move program files from C drive to D drive by just cutting and pasting?

    No, it is generally not safe to cut and paste program files. Programs create many associated files and registry entries linked to their installation path on the C drive. Simply moving them will break these links and prevent the programs from running correctly. Reinstallation is the safest method for traditional desktop programs.

    Q2: Will moving my personal files (documents, pictures) affect my computer’s performance?

    No, moving personal files like documents, pictures, videos, and downloads from your C drive to D drive will not negatively affect your computer’s performance. In fact, it will likely improve performance by freeing up space on your C drive, which is crucial for the operating system to function efficiently.

    Q3: What should I do if my D drive is full too?

    If both your C and D drives are full, consider these options: * Delete unnecessary files: Go through your drives and delete old, unused files, temporary files, and duplicate content. * Uninstall unused programs: Remove any programs you no longer need. * Use cloud storage: Move less frequently accessed files to cloud services like Google Drive, Dropbox, or OneDrive. * Add an external hard drive: For large backups or archives, an external hard drive is a great solution. * Upgrade your internal hard drive: If you consistently run out of space, it might be time to install a larger internal hard drive.

    Q4: Can I move the Windows operating system itself to the D drive?

    No, you cannot simply move the Windows operating system from the C drive to the D drive. The operating system is deeply integrated with the C drive as its boot partition. Moving it would render your system unbootable. If you need to change the OS location, it typically requires a clean installation or advanced cloning techniques for the entire drive.

    Q5: How often should I check my C drive space?

    It’s a good practice to check your C drive space periodically, perhaps once a month or every few weeks, especially if you download a lot of files or install new software regularly. Keeping at least 15-20% of free space on your C drive is generally recommended for optimal performance.

  • How to Check if Your Motherboard Supports GPU Upgrade

    How to Check if Your Motherboard Supports GPU Upgrade

    Upgrading your graphics card can dramatically boost your computer’s gaming, video editing, and rendering performance. But before purchasing a new GPU, it’s critical to check whether your motherboard supports a GPU upgrade. Follow this step-by-step guide to ensure compatibility.

    Step 1: Identify Your Motherboard Model

    1. Press Windows + R, type msinfo32, and press Enter.
    2. In the System Information window, look for BaseBoard Product and BaseBoard Manufacturer. Note these details.

    Alternatively:

    • Open your PC case and read the model number directly from the motherboard.

    Step 2: Check for a PCIe x16 Slot

    Most modern graphics cards require a PCIe x16 slot.

    1. Look up your motherboard model on the manufacturer’s website.
    2. Locate the specifications section and confirm it includes at least one PCIe x16 slot.
    3. Make sure it’s version PCIe 3.0 or higher. New GPUs are backward compatible, but performance may be limited on older slots.

    Step 3: Confirm BIOS Compatibility

    A newer GPU may not work with very old motherboards due to BIOS limitations.

    • Visit your motherboard manufacturer’s support page.
    • Look for BIOS update notes to see if newer GPUs are mentioned.
    • Update your BIOS if a newer version improves GPU compatibility.

    Step 4: Check Power Supply Requirements

    GPUs often require more power than integrated graphics.

    1. Determine your power supply unit (PSU) wattage.
    2. Check the GPU’s power requirements from the manufacturer.
    3. Ensure your PSU has the necessary PCIe power connectors (6-pin, 8-pin).

    Step 5: Measure Physical Space

    Some high-end GPUs are large and may not fit inside compact cases.

    1. Measure the internal clearance from the PCIe slot to any obstructions.
    2. Compare with the length and width of the new GPU.

    Step 6: Ensure CPU-GPU Compatibility

    While not strictly a motherboard issue, a weak CPU may bottleneck a high-end GPU.

    • Use online tools like bottleneck calculators.
    • Compare benchmarks of your CPU-GPU combo.

    Step 7: Verify Display Output Support (Optional)

    If your monitor uses HDMI 2.1, DisplayPort, or older ports like VGA/DVI, ensure the new GPU supports them.

    • Adapter options are available but may limit resolution or refresh rate.

    Final Check: Compatibility Summary

    Before purchasing a new GPU, confirm:

    • Your motherboard has a PCIe x16 slot (preferably PCIe 3.0 or higher).
    • Your BIOS is up to date.
    • Your power supply meets wattage and connector requirements.
    • The GPU physically fits inside your case.
    • Your CPU can keep up with the GPU.

    By carefully following these steps, you can confidently determine if your motherboard supports a GPU upgrade without compatibility issues.

  • How to Upgrade Your Laptop to SSD

    How to Upgrade Your Laptop to SSD

    Upgrading your laptop to an SSD (Solid State Drive) is one of the most impactful and cost-effective ways to breathe new life into an aging machine, or even to boost the performance of a newer one still using a traditional hard drive (HDD). Unlike HDDs, SSDs have no moving parts, resulting in dramatically faster boot times, quicker application loading, and overall snappier system responsiveness.

    This comprehensive guide will walk you through the entire process of upgrading your laptop to an SSD, covering how to choose the right SSD, migrating your data, and physically installing the new drive.

    Understanding SSD Types and Compatibility

    Before you begin, it’s crucial to identify which type of SSD your laptop supports and which form factor its current drive uses.

    1. 2.5-inch SATA SSD:
      • Appearance: Looks like a standard laptop hard drive (2.5 inches wide, usually 7mm thick).
      • Connection: Connects via a SATA (Serial ATA) interface.
      • Compatibility: Most common upgrade for older laptops that use 2.5-inch HDDs. These offer a significant speed boost over HDDs but are slower than NVMe SSDs.
    2. M.2 SATA SSD:
      • Appearance: A thin, rectangular stick resembling a RAM stick.
      • Connection: Connects via an M.2 slot and uses the SATA protocol.
      • Compatibility: Found in many modern laptops. Check your laptop’s specifications to see if it has an M.2 slot and if it supports SATA or NVMe.
    3. M.2 NVMe SSD:
      • Appearance: Also a thin, rectangular stick, similar to M.2 SATA.
      • Connection: Connects via an M.2 slot and uses the much faster NVMe (Non-Volatile Memory Express) protocol, which connects directly to the PCIe bus.
      • Compatibility: The fastest type of SSD available for consumer laptops. Only compatible if your laptop has an M.2 slot that specifically supports NVMe.

    How to Check Compatibility:

    • Consult Your Laptop Manual: The most accurate source of information.
    • Manufacturer’s Website: Look up your laptop’s exact model number on the manufacturer’s support page for specifications.
    • Physical Inspection (Advanced): If comfortable, open your laptop and look at the existing drive. A 2.5-inch drive is obvious. For M.2, look for an empty M.2 slot or an existing M.2 drive (it will have a sticker indicating SATA or NVMe).
    • System Information Tool (Windows): Open Task Manager (Ctrl+Shift+Esc), go to the Performance tab, and select Disk. It might list your current drive type. You can also search “System Information” in Windows, find “Components” > “Storage” > “Disks” to see your drive model, then search that model online.

    Recommendation: If your laptop supports NVMe, that’s generally the best choice for speed. If not, a 2.5-inch SATA SSD will still offer a massive performance upgrade over an HDD.

    What You’ll Need

    • New SSD: The correct type and size for your laptop. Consider storage needs (250GB, 500GB, 1TB, etc.).
    • External Hard Drive Enclosure or USB-to-SATA Adapter: Crucial for cloning your old drive to the new SSD. This allows you to connect the new SSD to your laptop externally via USB.
    • Small Phillips-Head Screwdriver: For opening your laptop and removing the old drive.
    • Non-Conductive Pry Tool (Optional but Recommended): For gently opening plastic clips without scratching.
    • Backup Device: An external hard drive or cloud storage for backing up critical data (just in case!).
    • Cloning Software: Free tools like Macrium Reflect Free, EaseUS Todo Backup Free, or the software often provided by SSD manufacturers (e.g., Samsung Data Migration, Crucial Acronis True Image).
    • Antistatic Wrist Strap (Optional but Recommended): To prevent electrostatic discharge (ESD) damage to internal components.
    • USB Installer for Windows/macOS (Optional): If you plan to perform a clean operating system installation instead of cloning.

    How to Upgrade Your Laptop to an SSD: Step-by-Step Process

    There are two main approaches: cloning your existing drive (keeping your OS, programs, and files) or performing a clean installation of the operating system. Cloning is generally easier for most users.

    Phase 1: Preparation and Data Migration (Cloning)

    This phase allows you to transfer your existing operating system, programs, and files to the new SSD.

    1. Backup Important Data: Even if you plan to clone, always back up your critical files to an external drive or cloud service. Accidents happen!
    2. Clean Up Your Old Drive:
      • Uninstall unnecessary programs: Go to Control Panel > Programs and Features (Windows 10) or Settings > Apps > Installed apps (Windows 11) and remove anything you don’t use.
      • Delete large, unneeded files: Clear out old downloads, temporary files, and duplicate documents.
      • Empty Recycle Bin.
      • Run Disk Cleanup: Search for “Disk Cleanup” in Windows, select your C: drive, and let it scan. Tick everything you’re comfortable deleting (Temporary files, Recycle Bin, etc.) and click OK.
      • Defragment (HDD only): If you’re cloning from an HDD, defragmenting it first can sometimes help the cloning process, though it’s not strictly necessary for an SSD target.
      • Goal: Make your current drive’s used space smaller than or equal to the new SSD’s capacity. If your current drive has 300GB of data and your new SSD is 250GB, you must delete enough data to fit.
    3. Connect the New SSD to Your Laptop:
      • Place the new 2.5-inch SATA SSD into the external hard drive enclosure or connect it using the USB-to-SATA adapter.
      • Plug the enclosure/adapter into an available USB port on your laptop.
      • For M.2 SSDs, you’ll need a compatible M.2 NVMe/SATA to USB enclosure or adapter.
    4. Initialize the New SSD (If necessary):
      • In Windows, search for and open Disk Management.”
      • You should see your new SSD listed (it might be “Disk 1,” “Disk 2,” etc.). It will likely show as “Unallocated.”
      • Right-click on the new SSD’s unallocated space and select “Initialize Disk.” Choose GPT (GUID Partition Table) for modern systems (Windows 10/11) and larger drives.
      • You don’t need to create a new simple volume yet; the cloning software will handle partitioning.
    5. Clone Your Drive:
      • Install Cloning Software: Install your chosen cloning software (e.g., Macrium Reflect Free, EaseUS Todo Backup Free, or the software provided by your SSD manufacturer like Samsung Data Migration).
      • Follow Software Instructions:
        • Open the cloning software.
        • Select your old HDD/SSD as the Source Disk.
        • Select your new SSD (connected via USB) as the Destination Disk.
        • The software will typically guide you through selecting which partitions to clone (usually all of them).
        • Start the cloning process. This can take anywhere from 30 minutes to several hours, depending on the amount of data and your laptop’s speed. Do NOT use your laptop during this process to avoid errors.
      • Verify Cloning (Optional but Recommended): Some cloning software allows you to verify the cloned data. It’s a good idea to use this feature if available.
      • Safely Eject: Once cloning is complete, safely eject the external SSD.

    Phase 2: Physical Installation

    This is where you’ll replace your old drive with the new SSD.

    1. Gather Your Tools: Screwdriver, pry tool, antistatic wrist strap.
    2. Power Down and Disconnect:
      • Shut down your laptop completely (not just sleep or hibernate).
      • Unplug the AC adapter from the laptop and the wall.
      • Remove all peripherals (USB drives, external mouse/keyboard, etc.).
    3. Discharge Static Electricity (Crucial):
      • If you have an antistatic wrist strap, wear it and clip it to a bare metal part of your laptop’s chassis.
      • If not, periodically touch a grounded metal object (like a metal faucet or an unpainted metal pipe) before touching any internal components.
    4. Access the Hard Drive Bay:
      • Flip your laptop over.
      • Most laptops have a removable panel on the bottom that covers the hard drive, RAM, or other components. Some laptops require removing the entire bottom case.
      • Use your Phillips-head screwdriver to remove the screws securing this panel or the entire bottom case. Keep track of which screws go where, as some may be different sizes.
      • Gently use a pry tool or your fingernail to pry open the panel.
    5. Locate and Remove the Old Drive:
      • The HDD/SSD will typically be secured in a bay with a bracket and a few small screws.
      • Remove the screws holding the drive in place.
      • Gently slide the drive out from its SATA connector.
      • If it’s in a caddy/bracket, remove the screws holding the old drive to the caddy, then remove the drive.
      • For M.2 SSDs: The M.2 drive is a stick held by a single small screw at the end. Unscrew it, and the drive will pop up slightly. Gently pull it out of the slot.
    6. Install the New SSD:
      • Attach the caddy/bracket: If your old drive had a caddy/bracket, transfer it to the new 2.5-inch SSD. Secure it with the screws.
      • Insert the New SSD: Gently slide the new 2.5-inch SSD into the SATA connector in the bay. Secure it with the screws.
      • For M.2 SSDs: Insert the M.2 SSD into the slot at an angle, push it down, and secure it with the single screw you removed earlier.
    7. Reassemble Your Laptop:
      • Carefully replace the access panel or the entire bottom case.
      • Replace all screws you removed, ensuring they are tightened but not overtightened.

    Phase 3: Post-Installation and Verification

    After the physical installation, it’s time to boot up and ensure everything is working correctly.

    1. Boot Up Your Laptop:
      • Reconnect the AC adapter.
      • Power on your laptop.
      • It should now boot much faster to your familiar Windows/macOS desktop.
    2. Verify the SSD:
      • Windows:
        • Press Ctrl + Shift + Esc to open Task Manager.
        • Go to the Performance tab and select Disk. It should now show your new SSD model.
        • You can also right-click the Start button, select “Disk Management,” and confirm your SSD is listed as the primary drive.
      • macOS: Go to About This Mac > System Report > Storage.
    3. Check for TRIM Support (Windows): TRIM helps SSDs maintain performance over time.
      • Open Command Prompt as an administrator.
      • Type fsutil behavior query DisableDeleteNotify and press Enter.
      • If the result is DisableDeleteNotify = 0, TRIM is enabled (good!). If it’s 1, it’s disabled, which is rare for modern Windows versions with SSDs.
    4. Enjoy the Speed Boost! You should immediately notice a dramatic improvement in boot times, application loading, and overall system responsiveness.

    Clean Installation (Alternative to Cloning)

    If you prefer a fresh start or don’t want to transfer old clutter, you can perform a clean installation of your operating system.

    1. Create a USB Installer:
      • Windows: Use the Media Creation Tool from Microsoft’s website.
      • macOS: Create a bootable macOS installer on a USB drive.
    2. Install New SSD: Follow Phase 2 to physically install the new SSD.
    3. Boot from USB:
      • Plug in the USB installer.
      • Turn on your laptop and immediately press the BIOS/UEFI boot menu key (commonly F2, F10, F12, Del, or Esc – varies by manufacturer).
      • Select your USB drive as the boot device.
    4. Install OS: Follow the on-screen prompts to install Windows or macOS on your new SSD.
    5. Install Drivers: After installation, download and install all necessary drivers from your laptop manufacturer’s website (chipset, graphics, audio, Wi-Fi, etc.).

    Upgrading to an SSD is a rewarding project that revitalizes your laptop. By following these steps carefully, you can successfully replace your old drive and enjoy the significant performance benefits of an SSD.

  • How to Use Quick Share on Samsung to Send Files

    How to Use Quick Share on Samsung to Send Files

    Quick Share is Samsung’s super fast and easy way to share photos, videos, documents, and more between Samsung Galaxy devices—and now, even other Android phones, Chromebooks, and Windows PCs. It uses Wi-Fi Direct and Bluetooth to make local transfers much quicker than email or cloud uploads. Here’s how to use it.

    Why Choose Quick Share?

    Quick Share offers some great perks:

    • Speed: Transfers large files quickly, perfect for videos and multiple photos.
    • Convenience: No cables or complicated setup needed.
    • Original Quality: Files send without compression.
    • Versatile: Works with almost any file type.
    • Multi-device support: Sends files to Samsung devices, Android phones with Nearby Share, Chromebooks, and Windows PCs with the Quick Share app.

    What You Need Before Starting

    • Compatible devices: Your Samsung Galaxy (2020+ models usually), plus the receiving device must support Quick Share or Nearby Share (Android, Chromebook, or Windows with the app).
    • Bluetooth and Wi-Fi enabled on both devices.
    • Devices close to each other, within Bluetooth/Wi-Fi range.
    • Receiver’s visibility set to allow sharing.

    Step-by-Step: Sending Files with Quick Share

    Step 1: Pick Your Files

    • Open the Gallery, My Files, or any app with the files you want to share.
    • Select one or multiple files (long-press for multiple).
    • Tap the Share icon.

    Step 2: Choose Quick Share

    • From the share options, tap the Quick Share icon (usually two arrows in a circle or a paper airplane).

    Step 3: Select the Receiving Device

    • Your phone will scan for nearby devices with Quick Share/Nearby Share enabled.
    • Tap the name of the device you want to send to.
    • If you don’t see the device, double-check Bluetooth/Wi-Fi and visibility settings on the receiver.

    Step 4: Accept on the Receiver

    • A prompt appears on the receiving device with a preview of the files.
    • Tap Accept to start the transfer.

    Step 5: Wait for Transfer to Complete

    • Both devices show progress bars.
    • When done, you’ll get a confirmation.
    • On the receiver, files usually save to an internal “Quick Share” folder (access via My Files), and photos/videos also appear in Gallery.

    Setting Your Device’s Quick Share Visibility

    To receive files, your device must be discoverable:

    1. Swipe down twice from the top to open the full Quick Panel.
    2. Find the Quick Share toggle and long-press it.
    3. Choose who can see your device:
      • Everyone: Visible to all nearby devices (least secure).
      • Contacts only: Only visible to your Google contacts (recommended).
      • Your devices: Only your logged-in Samsung/Google devices.
      • Hidden: Not visible.

    Using Quick Share with Other Devices

    • Non-Samsung Android devices: Thanks to integration with Nearby Share, Quick Share works seamlessly with most Android phones.
    • Windows PCs: Install Samsung’s Quick Share app from Microsoft Store or Samsung’s site. Set your PC’s visibility in the app, then send files from your phone as usual. Accept transfers on the PC when prompted.

    Quick Share makes moving files around super easy and fast—no cables, no fuss, just quick sharing between your devices and friends’.

  • How to Reinstall Windows Without Losing Data

    How to Reinstall Windows Without Losing Data

    Reinstalling Windows can resolve slowdowns, malware, or system glitches—but what if you don’t want to lose your files? The good news: there are ways to reinstall Windows while keeping your data intact. This guide walks you through your options.

    Why Reinstall Windows?

    • System performance issues
    • Malware or corruption
    • Preparing to sell or repurpose a PC
    • Clean OS upgrade

    What “Without Losing Data” Means

    • Keeps: Your documents, photos, videos, and music
    • Removed: Most apps/programs and system settings

    Important: Always back up first to an external drive or cloud service, just in case.

    Method 1: Reset This PC (Windows 10/11)

    1. Go to Settings > System > Recovery (Windows 11) or Settings > Update & Security > Recovery (Windows 10).
    2. Click Reset PC > choose Keep my files.
    3. Pick Cloud download (freshest version) or Local reinstall (faster).
    4. Confirm and proceed. Windows reinstalls and reboots. Your files remain.

    Method 2: In-Place Upgrade/Repair with Installation Media

    1. Download the Windows ISO or Media Creation Tool from Microsoft’s website.
    2. Mount the ISO (double-click it) or use Media Tool to create bootable USB.
    3. Run setup.exe inside the ISO or USB.
    4. When prompted, select Keep personal files and apps.
    5. Let the installation complete. Most of your setup and files stay untouched.

    Method 3: Clean Install with Backup and Restore (Most Thorough)

    Phase 1: Backup Your Files

    • Use an external drive or cloud storage
    • Back up Documents, Pictures, Videos, Music, Downloads, and app data (check C:\Users\YourName)
    • Export browser bookmarks and note down software keys

    Phase 2: Perform Clean Install

    1. Create a bootable USB with the Media Creation Tool or Rufus.
    2. Boot from USB: Restart PC > BIOS/UEFI > Set USB as boot device.
    3. Choose Custom: Install Windows only.
    4. Delete the partition where Windows is installed (usually Drive 0, Partition 1).
    5. Select unallocated space > click Next.
    6. Install proceeds. Follow prompts to configure Windows.

    Phase 3: Restore Files & Reinstall Apps

    • Copy backed-up data to the new Windows install
    • Reinstall your applications manually

    Tips Before You Begin

    • Record product keys for licensed software
    • Download key drivers beforehand (Wi-Fi, graphics, chipset)
    • Use a stable internet connection if choosing cloud install
    • Set aside a few hours for full reinstall + setup

    By following these steps, you can give your PC a clean slate without sacrificing your valuable data.

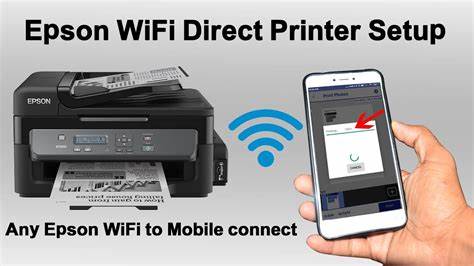
  • How to Connect a Printer to Windows over Wi-Fi

    How to Connect a Printer to Windows over Wi-Fi

    Let’s face it—dealing with printer cables can be a hassle. Setting up your printer over Wi-Fi? Way more convenient. These days, most modern printers come ready for wireless connectivity, and Windows does a pretty decent job guiding you through the process. Here’s a clear, human-friendly breakdown to help you get your printer talking to your computer over Wi-Fi.

    Why Connect a Printer Over Wi-Fi?

    Some solid reasons to go wireless:

    • No Wires, No Mess: Place your printer wherever you want, without worrying about cord lengths.
    • Shared Access: Everyone on the same network can use it—great for households or small teams.
    • Room to Move: Print from your kitchen, your couch, your patio, wherever.
    • It’s the Norm: Most printers today are built with Wi-Fi in mind.

    What You’ll Need First

    Before jumping in, make sure you have:

    • A Wi-Fi capable printer (look for a wireless symbol or check the specs).
    • A working Wi-Fi network and the SSID + password (usually on your router).
    • A Windows computer (Windows 10 or 11 works best).
    • Your printer’s manual just in case it does something funky.
    • Both devices powered on and ready.

    Step 1: Get the Printer on Your Wi-Fi

    This part happens directly on the printer:

    1. Find the Wireless Setup:
      • Use the printer’s screen or buttons to navigate to something like “Network Setup” or “Wireless Settings.”
    2. Start Wireless Setup Wizard:
      • Choose “Wireless Setup Wizard.” It scans for Wi-Fi networks.
    3. Pick Your Network:
      • Select your Wi-Fi name (SSID).
    4. Enter the Password:
      • Carefully type in the Wi-Fi password. It’s case-sensitive.
    5. Confirm Connection:
      • Once connected, you’ll usually see a confirmation message. If not, double-check the password and try again.

    Alternate Methods:

    • WPS: Press the WPS button on your router and the printer (if both support it).
    • USB Setup: Temporarily plug the printer into your PC with a USB cable and let the software do the Wi-Fi setup.

    Step 2: Add the Printer to Windows

    Once the printer is on Wi-Fi, here’s how to link it to your computer:

    1. Open Settings:
      • Click Start > Settings (gear icon), or press Windows + I.
    2. Go to Devices:
      • Click “Bluetooth & devices” (Windows 11) or “Devices” (Windows 10).
    3. Printers & Scanners:
      • Click this option.
    4. Add a Printer:
      • Click “Add device” next to “Add a printer or scanner.”
    5. Wait for Discovery:
      • Windows scans for printers. This might take a moment.
    6. Select Your Printer:
      • When it appears, click on it, then click “Add device.”
    7. Drivers Install:
      • Windows usually handles this automatically.
      • If not, go to the printer maker’s website, find your model, and download the driver package.
    8. Print a Test Page:
      • Right-click the printer in Settings > “Manage” > “Print a test page.”

    Troubleshooting Tips

    • Printer Not Found?
      • Confirm it’s connected to Wi-Fi and on the same network as your computer.
      • Restart printer, router, and computer.
      • Disable firewall temporarily to test.
      • Avoid guest networks; they often block printer discovery.
    • Jobs Get Stuck?
      • Open the printer queue and clear stuck jobs.
      • Restart the Print Spooler (search “services.msc” > find “Print Spooler” > Restart).
      • Update drivers from the manufacturer’s website.
    • Slow/Unstable Printing?
      • Move the printer closer to the router.
      • Keep it away from interference (microwaves, phones).
      • Try switching the router to a less crowded Wi-Fi channel.

    A Quick Story from Experience

    I still remember fighting with a wireless printer late at night—printer was connected, but Windows just wouldn’t see it. Turns out, my computer was on the 5GHz band while the printer only worked on 2.4GHz. They were technically on the same network but couldn’t find each other. Switching bands did the trick, and I was back to printing in minutes.

    Wrapping Up

    Wi-Fi printers can seem tricky at first, but once you get the hang of it, they’re incredibly freeing. No cables, no constant plugging and unplugging—just smooth, wireless printing from wherever you are. Follow these steps, and you should be printing in no time.

  • How to Add a Network Printer to Windows PC

    How to Add a Network Printer to Windows PC

    Adding a network printer to a Windows PC allows for shared access across devices without direct USB connections. This guide walks you through the essential steps and options for setting up a network printer in Windows.

    Prerequisites

    • Printer is powered on and connected to the same network as your PC.
    • Wired printers: connected via Ethernet.
    • Wireless printers: connected to the Wi-Fi.
    • PC is also on the same network.
    • Optional: Printer’s IP address and latest drivers from the manufacturer’s website.

    Method 1: Add Printer via Windows Settings

    1. Open Settings (Windows key + I).
    2. Go to Bluetooth & devices (Windows 11) or Devices (Windows 10).
    3. Click Printers & scanners.
    4. Select Add device.
    5. Wait for your printer to appear > Click Add device.

    If it works, print a test page to confirm setup.

    Method 2: Manual Setup with IP Address

    If automatic detection fails:

    1. Repeat steps 1–4 from Method 1.
    2. Click The printer that I want isn’t listed.
    3. Select Add a printer using a TCP/IP address.
    4. Enter your printer’s IP address (e.g., 192.168.1.150).
    5. Choose driver:
      • If detected: let Windows install it.
      • If not: use “Have Disk…” and navigate to downloaded driver files.
    6. Name your printer.
    7. Choose not to share (if it’s already network-shared).
    8. Print a test page > Click Finish.

    Method 3: Use Manufacturer’s Setup Software

    1. Visit your printer manufacturer’s website.
    2. Search for your printer model.
    3. Download full driver/software package.
    4. Run the installer and follow guided steps.

    This often includes scanning utilities and advanced settings.

    Troubleshooting

    • Printer Not Found:
      • Ensure it’s connected and on the same network.
      • Restart printer and router.
      • Temporarily disable firewall.
      • Confirm correct IP address.
    • Driver Issues:
      • Download latest driver.
      • Uninstall and re-add printer with updated driver.
    • Print Errors:
      • Check printer status (paper, ink).
      • Clear printer queue.
    • Access Errors:
      • Enable network discovery.
      • Seek admin rights in office settings.

    Tip: Assign a static IP for critical printers to prevent connectivity loss. With these steps, you can successfully add and manage a network printer on your Windows PC.