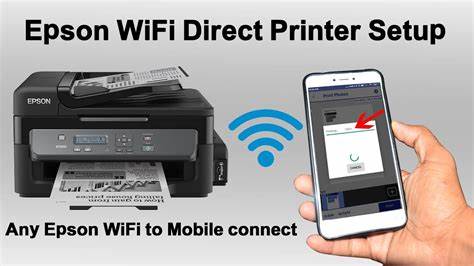
Let’s face it—dealing with printer cables can be a hassle. Setting up your printer over Wi-Fi? Way more convenient. These days, most modern printers come ready for wireless connectivity, and Windows does a pretty decent job guiding you through the process. Here’s a clear, human-friendly breakdown to help you get your printer talking to your computer over Wi-Fi.
Why Connect a Printer Over Wi-Fi?
Some solid reasons to go wireless:
- No Wires, No Mess: Place your printer wherever you want, without worrying about cord lengths.
- Shared Access: Everyone on the same network can use it—great for households or small teams.
- Room to Move: Print from your kitchen, your couch, your patio, wherever.
- It’s the Norm: Most printers today are built with Wi-Fi in mind.
What You’ll Need First
Before jumping in, make sure you have:
- A Wi-Fi capable printer (look for a wireless symbol or check the specs).
- A working Wi-Fi network and the SSID + password (usually on your router).
- A Windows computer (Windows 10 or 11 works best).
- Your printer’s manual just in case it does something funky.
- Both devices powered on and ready.
Step 1: Get the Printer on Your Wi-Fi
This part happens directly on the printer:
- Find the Wireless Setup:
- Use the printer’s screen or buttons to navigate to something like “Network Setup” or “Wireless Settings.”
- Start Wireless Setup Wizard:
- Choose “Wireless Setup Wizard.” It scans for Wi-Fi networks.
- Pick Your Network:
- Select your Wi-Fi name (SSID).
- Enter the Password:
- Carefully type in the Wi-Fi password. It’s case-sensitive.
- Confirm Connection:
- Once connected, you’ll usually see a confirmation message. If not, double-check the password and try again.
Alternate Methods:
- WPS: Press the WPS button on your router and the printer (if both support it).
- USB Setup: Temporarily plug the printer into your PC with a USB cable and let the software do the Wi-Fi setup.
Step 2: Add the Printer to Windows
Once the printer is on Wi-Fi, here’s how to link it to your computer:
- Open Settings:
- Click Start > Settings (gear icon), or press Windows + I.
- Go to Devices:
- Click “Bluetooth & devices” (Windows 11) or “Devices” (Windows 10).
- Printers & Scanners:
- Click this option.
- Add a Printer:
- Click “Add device” next to “Add a printer or scanner.”
- Wait for Discovery:
- Windows scans for printers. This might take a moment.
- Select Your Printer:
- When it appears, click on it, then click “Add device.”
- Drivers Install:
- Windows usually handles this automatically.
- If not, go to the printer maker’s website, find your model, and download the driver package.
- Print a Test Page:
- Right-click the printer in Settings > “Manage” > “Print a test page.”
Troubleshooting Tips
- Printer Not Found?
- Confirm it’s connected to Wi-Fi and on the same network as your computer.
- Restart printer, router, and computer.
- Disable firewall temporarily to test.
- Avoid guest networks; they often block printer discovery.
- Jobs Get Stuck?
- Open the printer queue and clear stuck jobs.
- Restart the Print Spooler (search “services.msc” > find “Print Spooler” > Restart).
- Update drivers from the manufacturer’s website.
- Slow/Unstable Printing?
- Move the printer closer to the router.
- Keep it away from interference (microwaves, phones).
- Try switching the router to a less crowded Wi-Fi channel.
A Quick Story from Experience
I still remember fighting with a wireless printer late at night—printer was connected, but Windows just wouldn’t see it. Turns out, my computer was on the 5GHz band while the printer only worked on 2.4GHz. They were technically on the same network but couldn’t find each other. Switching bands did the trick, and I was back to printing in minutes.
Wrapping Up
Wi-Fi printers can seem tricky at first, but once you get the hang of it, they’re incredibly freeing. No cables, no constant plugging and unplugging—just smooth, wireless printing from wherever you are. Follow these steps, and you should be printing in no time.


