Changing the system language in Windows 10 allows you to see menus, dialog boxes, and other Windows elements in a different language. This is useful if you’ve purchased a computer in one region and want to use it in another language, or if multiple users with different language preferences use the same computer. While it seems like it should be a simple switch, sometimes you need to add the language first and ensure it applies everywhere in Windows. I’ve helped several people set up their computers in a language different from the original installation, and the key is making sure all the necessary components are installed and applied correctly.
Here’s a detailed guide on how to change the system display language in Windows 10.
Step 1: Add the Language Pack
If the language you want isn’t already installed on your system, you’ll need to add a language pack.
- Click the Start button.
- Click the Settings icon (the gear).
- In the Settings window, click on “Time & Language”.
- In the left-hand menu, click on “Language” (or “Language & region” in newer Windows versions).
- Under “Preferred languages,” click the “+ Add a language” button.
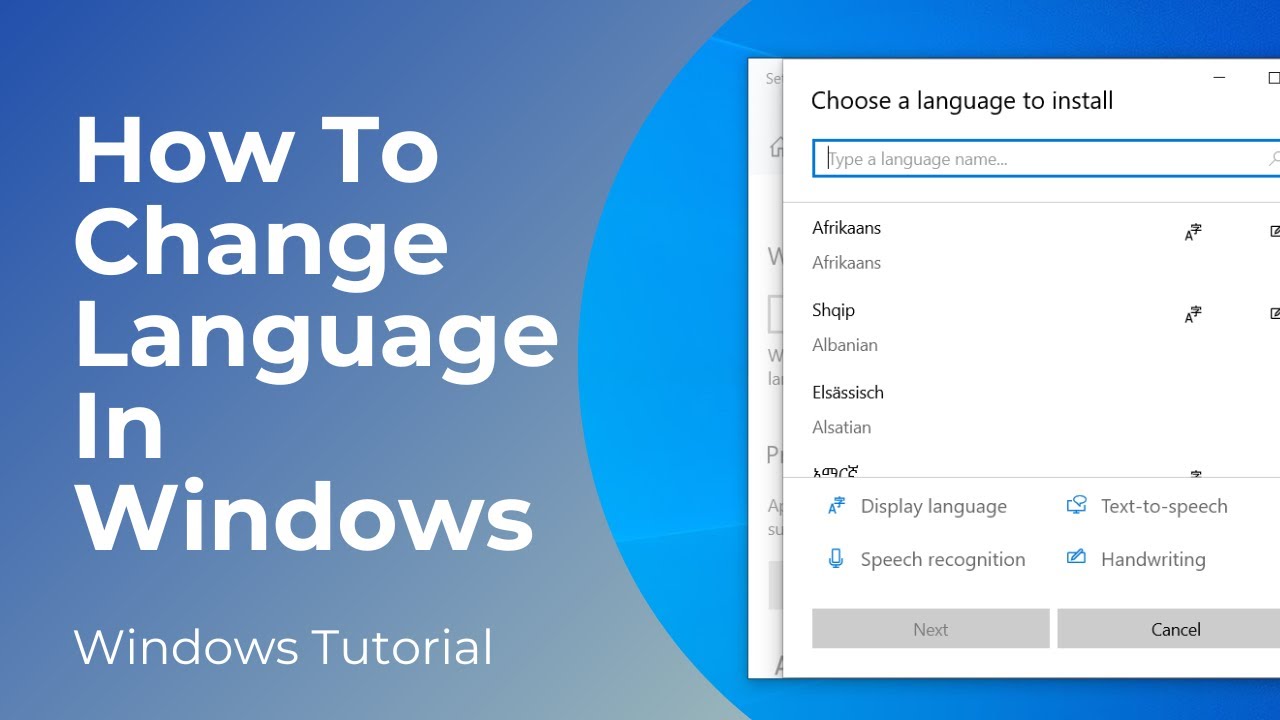
- In the “Choose a language to install” window, type the name of the language you want to add (e.g., “Español,” “Français,” “Deutsch”).
- Select the language from the list that appears.
- Click “Next”.
How to Choose Language Features: On the “Install language features” screen, make sure “Install language pack” is checked. You can also choose to install other features like Text-to-speech or Handwriting for that language if you need them. If you want this language to become your primary Windows language immediately, check the box that says “Set as my Windows display language.”
- Click “Install“.
How to Install: Windows will download and install the language pack from the internet. This can take some time depending on your internet speed. You’ll see the new language appear in your list of Preferred languages.
Step 2: Set Your Windows Display Language
If you didn’t check “Set as my Windows display language” during installation, or if you want to switch between installed languages, you can do it here.
- Go back to Settings > Time & Language > Language.
- Under “Windows display language,” click the drop-down menu.
- Select the language you want Windows to use for its interface.
How to Apply: After selecting a new display language, you’ll see a message that says, “Windows needs to sign you out in order to apply your new display language.”
- Click the “Sign out“ button.
Step 3: Sign Out and Sign Back In
Signing out and back in is necessary for the changes to take full effect for your user account.
- Save any open work, as signing out will close your applications.
- Click “Sign out“.
- At the login screen, enter your password and sign back into your user account.
How it Works: After you sign back in, Windows should now be displayed in the language you selected for your user account. Menus, system messages, and many built-in applications will appear in the new language. I remember the satisfaction of logging back in the first time and seeing the entire interface switch languages.
Step 4: Apply Language to Welcome Screen, System Accounts, and New User Accounts (Optional but Recommended)
Changing the display language as described above usually only applies to your current user account. To change the language for the Windows welcome screen (login screen), system accounts, and any new user accounts you create in the future, you need to adjust a separate setting.
- Click the Start button.
- Type “Control Panel” and click on Control Panel in the search results.
- In Control Panel, make sure “View by” is set to “Category”, then click on “Clock, Language, and Region”. If “View by” is set to icons, click on “Region”.
- Click on “Region”.
- In the Region window, go to the “Administrative” tab.
- Under “Welcome screen and new user accounts,” click the “Copy settings…” button. You may need administrator permissions.
- In the “Welcome screen and new user accounts settings” window, you’ll see the current language settings for your user and the Welcome screen/System accounts.
- Check the boxes for “Welcome screen and system accounts” and “New user accounts”.
- Click “OK”.
- Click “OK” again in the Region window.
How to Apply System-Wide: You will be prompted to restart your computer for these changes to take effect.
- Save any open work.
- Click “Restart now”.
After restarting, the Windows welcome screen and the default language for any newly created user accounts should now be in the language you chose. This step ensures a consistent language experience across the entire system, not just for your individual account.
Troubleshooting Common Issues
- Language Pack Not Installing: Ensure you have a stable internet connection. Sometimes, temporarily disabling your antivirus or firewall can help (remember to re-enable them afterward). You can try removing the partially installed language and adding it again. Make sure Windows Update is working correctly.
- Language Not Changing After Sign Out: Double-check that the language you selected under “Windows display language” is correct and that you did sign out and sign back in.
- Welcome Screen Language Not Changing: Make sure you performed Step 4 correctly and restarted your computer. Confirm that the language you want is at the top of the “Preferred languages” list for your user account before copying the settings in Step 4.
- Some Parts of Windows Still in Old Language: While language packs translate most of the interface, some elements from older parts of Windows or certain third-party applications might not fully translate. This is usually normal.
Changing the system language in Windows 10 involves adding the desired language pack, setting it as your display language, and optionally applying it system-wide. While it sometimes requires a few steps and restarts, following this process ensures that your Windows experience is in the language you prefer. It’s a simple way to personalize your computer or make it usable for someone with different language needs.